Table of Contents
1. Choose the Right Planting Site
Hydrangeas thrive in semi-shaded areas that provide morning sun and protection from harsh afternoon sunlight. However, panicle hydrangeas prefer full sun for optimal blooms. Selecting the correct site prevents leaf scorch and encourages healthy flowering.
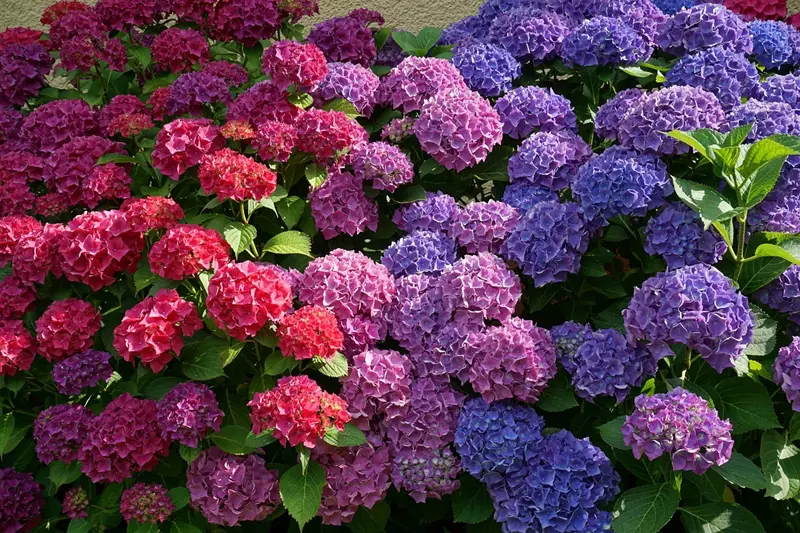 Hydrangea bushes full of flowers - Source: pixabay.com; Author: Adriana Knop; License: Pixabay Content License
Hydrangeas are beloved for their vibrant blooms and lush foliage, but their beauty depends heavily on where they are planted. Selecting the correct site for your hydrangeas ensures not only abundant flowering but also the overall health of the plant. This guide explores the specific needs of popular varieties like garden hydrangeas (Hydrangea macrophylla) and panicle hydrangeas (Hydrangea paniculata).
Understanding Light Requirements
Light exposure is a key factor when choosing a planting site:
- Garden Hydrangeas: These thrive in semi-shaded locations that provide morning sun and protection from the intense afternoon heat. Direct sunlight during peak hours can scorch the leaves and reduce flowering.
- Panicle Hydrangeas: In contrast, panicle hydrangeas perform best in full sun. They are more tolerant of direct sunlight and often produce larger and more vibrant blooms when grown in bright conditions.
Assess the light patterns in your garden to match the requirements of the hydrangea variety you plan to grow.
Protecting from Harsh Weather Conditions
In addition to light, hydrangeas benefit from protection against extreme weather conditions:
- Wind Protection: Strong winds can damage hydrangea buds and flowers, especially in exposed areas. Planting near walls, fences, or taller shrubs provides a natural windbreak.
- Temperature Regulation: Hydrangeas appreciate stable temperatures. Avoid planting in low-lying areas where cold air settles, as this increases the risk of frost damage.
Soil Considerations for the Planting Site
Soil quality is another critical factor:
- Drainage: Ensure the soil is well-draining to prevent root rot. Avoid planting in waterlogged areas.
- Fertility: Hydrangeas prefer rich, organic soil. Incorporate compost or well-rotted manure before planting to boost nutrient levels.
Adjusting the Planting Site for Specific Needs
If your garden lacks the ideal conditions for hydrangeas, consider these adjustments:
- Creating Shade: Use shade cloth or plant hydrangeas under trees with dappled light to replicate their natural habitat.
- Improving Drainage: For heavy clay soils, plant hydrangeas in raised beds or amend the soil with sand and organic matter.
Tailoring the planting site to the needs of your hydrangeas increases their chances of thriving.
Selecting the right planting site is the foundation of successful hydrangea care. By considering light, weather protection, and soil conditions, you can create an environment where your hydrangeas will flourish. With proper placement, these stunning plants will reward you with vibrant blooms and lush growth for years to come.
2. Create a Suitable Microclimate
Plant hydrangeas in wind-sheltered locations to protect buds and flowers from damage. Small gardens benefit from planting hydrangeas near walls, fences, or taller plants that provide natural barriers. This microclimate fosters better growth and abundant flowering.
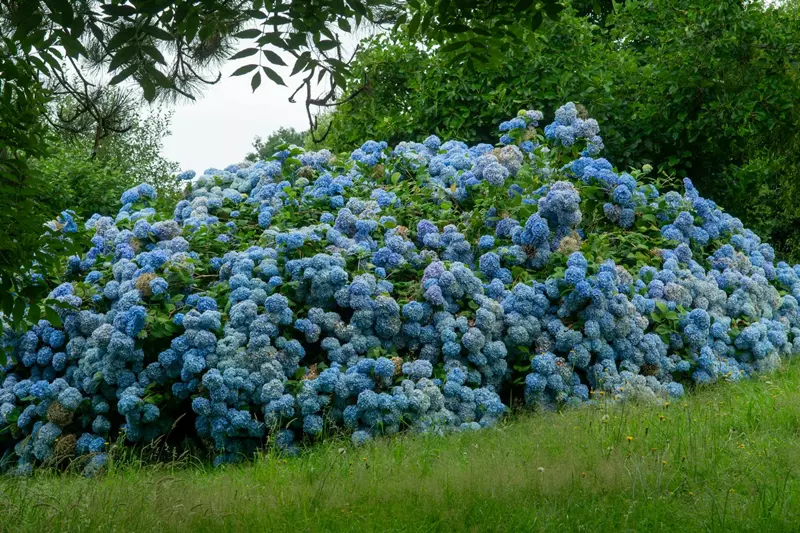 Source: pexels.com; Author: Jan van der Wolf; License: Pexels License
Hydrangeas are sensitive to their immediate surroundings, making a suitable microclimate essential for their health and blooming potential. A well-considered environment protects hydrangeas from harsh weather conditions while enhancing their growth and floral display. This guide explores practical ways to create an ideal microclimate for your hydrangeas.
Importance of Wind Protection
Hydrangeas, especially their delicate buds and flowers, are vulnerable to damage from strong winds. Implementing wind protection helps maintain plant health and ensures better flowering:
- Natural Windbreaks: Plant hydrangeas near walls, fences, or tall shrubs that block wind without limiting light. These barriers provide both physical protection and a more stable environment.
- Strategic Placement: Position hydrangeas in sheltered corners of the garden where they are naturally shielded from prevailing winds.
Temperature Regulation
A stable microclimate helps protect hydrangeas from temperature fluctuations that can stress the plant and reduce blooming:
- Avoid Frost Pockets: Low-lying areas often collect cold air, increasing the risk of frost damage. Plant hydrangeas on slightly elevated ground to avoid these pockets.
- Shade Management: For hydrangeas requiring dappled shade, such as garden hydrangeas (Hydrangea macrophylla), choose spots beneath deciduous trees that offer seasonal protection.
Enhancing Soil Conditions
The microclimate around hydrangeas can also be improved by addressing soil conditions:
- Mulching: Apply organic mulch around the base to regulate soil temperature, retain moisture, and suppress weeds.
- Soil Aeration: Periodically aerate the soil to improve root oxygenation, particularly in compacted areas.
Benefits of Companion Planting
Surrounding hydrangeas with companion plants contributes to a balanced microclimate:
- Protective Plants: Use taller perennials or evergreen shrubs to create a natural barrier against wind and excessive sunlight.
- Complementary Growth: Companion plants like ferns and hostas thrive in similar conditions and help maintain consistent soil moisture and shade.
Creating a suitable microclimate for hydrangeas is key to their success in the garden. By ensuring wind protection, temperature regulation, and optimal soil conditions, you can foster an environment where hydrangeas thrive and produce abundant, stunning blooms. Thoughtful placement and companion planting further enhance their beauty and resilience, making them a standout feature in any landscape.
3. Adjusting Soil pH for Hydrangeas
Soil pH influences bloom colour and quality. Acidic soils (pH 5.5-6) result in blue flowers, while neutral to slightly alkaline soils (pH 6.5-7) produce pink blooms. Panicle hydrangeas are less sensitive to soil pH and bloom well regardless of soil type.
Soil pH plays a significant role in the health and appearance of hydrangeas, particularly in determining bloom colour. By understanding and adjusting soil pH, gardeners can achieve their desired flower hues and ensure the plant’s vitality. This guide delves into the nuances of soil pH adjustment for hydrangeas, focusing on their specific needs and practical techniques.
The Role of Soil pH in Hydrangea Colour
The colour of hydrangea flowers, especially those of garden hydrangeas (Hydrangea macrophylla), is directly influenced by soil pH:
- Acidic Soil (pH 5.5–6): Encourages blue flowers by increasing the availability of aluminium in the soil.
- Neutral to Slightly Alkaline Soil (pH 6.5–7): Promotes pink flowers due to reduced aluminium uptake.
Panicle hydrangeas (Hydrangea paniculata) are less affected by soil pH, maintaining their bloom colour regardless of conditions.
Testing Soil pH
Before adjusting soil pH, it is essential to determine its current level. Follow these steps:
- Purchase a Soil Test Kit: Available at garden centres or online, these kits provide a quick and accurate pH reading.
- Collect a Soil Sample: Take a sample from the area where the hydrangea will be or is planted, mixing soil from several spots for an accurate average.
- Analyse the Results: Follow the kit instructions to determine whether your soil is acidic, neutral, or alkaline.
Adjusting Soil pH
Based on your soil test results, take the following actions to achieve the desired pH:
- Lowering pH for Blue Blooms: Add soil acidifiers such as aluminium sulphate or sulphur. Apply in small amounts and retest the soil periodically.
- Raising pH for Pink Blooms: Incorporate garden lime to neutralise acidity. Spread evenly and water well after application.
- Organic Alternatives: Use natural amendments like pine needles or composted oak leaves for gradual pH adjustment.
Maintenance of Soil pH
Maintaining the desired pH requires regular monitoring and adjustments:
- Annual Testing: Conduct soil tests each year to track changes and make necessary amendments.
- Consistent Mulching: Organic mulches such as pine bark or wood chips can help stabilise soil pH over time.
- Balanced Fertilisation: Avoid overuse of high-nitrogen fertilisers, which can alter soil pH and affect plant health.
Special Considerations for Panicle Hydrangeas
Panicle hydrangeas are less demanding regarding soil pH. They thrive in a wide range of conditions and will bloom abundantly regardless of pH. This makes them an excellent choice for gardeners who prefer low-maintenance plants with consistent results.
Adjusting and maintaining soil pH is a crucial step in hydrangea care, particularly for achieving specific bloom colours in garden hydrangeas. By testing the soil, making targeted amendments, and regularly monitoring conditions, you can create the ideal environment for your hydrangeas to thrive and display their vibrant beauty.
4. Regular Watering: A Key to Healthy Hydrangeas
Hydrangeas have high water needs, especially during the flowering season. Keep the soil consistently moist, but avoid waterlogging to prevent root rot.
Hydrangeas are known for their stunning blooms and lush foliage, but their beauty depends heavily on consistent and proper watering. As high-moisture plants, hydrangeas require careful attention to their water needs, particularly during the growing and flowering seasons. This guide provides practical tips for maintaining optimal soil moisture while avoiding common issues like root rot.
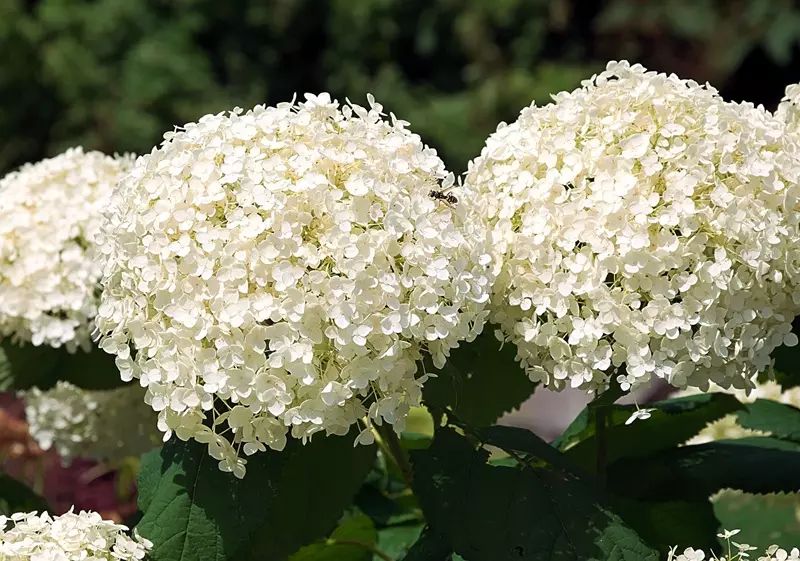 Source: pixabay.com; Author: Hans Linde; License: Pixabay Content License
Understanding Hydrangeas’ Water Needs
Hydrangeas have unique water requirements that vary depending on the species and growing conditions:
- High Moisture Demand: Hydrangeas thrive in consistently moist soil but are sensitive to overwatering and waterlogged conditions.
- Seasonal Variations: During the flowering season, hydrangeas require more frequent watering to support bloom development and prevent wilting.
Regular watering not only promotes healthy growth but also enhances the vibrancy and longevity of hydrangea flowers.
Watering Techniques for Hydrangeas
Proper watering techniques are essential to maintaining soil moisture without causing harm to the roots:
- Deep Watering: Water deeply and thoroughly, ensuring the soil is moist at least 15 cm below the surface. This encourages deeper root growth.
- Morning Watering: Water hydrangeas in the early morning to allow moisture to penetrate the soil before the heat of the day. This reduces evaporation and ensures hydration during peak temperatures.
- Avoiding Overhead Watering: Use a soaker hose or direct water at the base of the plant to keep foliage dry and reduce the risk of fungal diseases.
Preventing Common Water-Related Issues
While consistent watering is vital, improper practices can lead to problems:
- Preventing Root Rot: Ensure well-draining soil and avoid water pooling around the base of the plant.
- Avoiding Water Stress: Monitor soil moisture regularly, particularly during hot and dry spells, to prevent wilting or leaf scorch.
Maintaining a balance between adequate hydration and proper drainage is key to healthy hydrangeas.
Adjusting Watering Practices for Different Conditions
Environmental factors such as soil type and climate influence how often hydrangeas should be watered:
- Clay Soils: Water less frequently but deeply, as clay retains moisture longer.
- Sandy Soils: Water more frequently, as sandy soils drain quickly and dry out faster.
- Hot Climates: Increase watering frequency during prolonged heatwaves to prevent stress and dehydration.
Using Mulch to Retain Moisture
Mulching is an effective way to support regular watering efforts:
- Moisture Retention: Apply a 5 cm layer of organic mulch, such as wood chips or compost, around the base of the hydrangea to reduce evaporation.
- Weed Suppression: Mulch minimises competition for water by preventing weeds from establishing near the plant.
Regular watering is a cornerstone of hydrangea care, ensuring vibrant blooms and robust growth. By understanding their moisture needs, adopting effective watering techniques, and preventing common issues like root rot, you can maintain the health and beauty of these stunning plants. With thoughtful practices and consistent attention, hydrangeas will reward you with lush foliage and dazzling flowers throughout the growing season.
5. Providing Proper Nutrient Supply for Hydrangeas
Use slow-release natural fertilisers like chicken or cow manure granules in spring and summer. Adding humic acid enhances the breakdown of organic matter, aiding nutrient absorption. Avoid excessive nitrogen, as it promotes foliage growth at the expense of flowers.
Hydrangeas require a steady supply of nutrients to maintain their lush foliage and produce abundant blooms. By using natural fertilisers, enhancing soil health with humic acid, and applying mulch, gardeners can ensure their hydrangeas thrive. This guide outlines effective nutrient supply practices tailored to hydrangeas.
The Importance of Proper Nutrient Supply
Hydrangeas are heavy feeders, especially during their growing and flowering seasons. A lack of essential nutrients can lead to:
- Stunted Growth: Insufficient nutrients hinder the development of new shoots and leaves.
- Poor Flowering: A nutrient deficiency can result in fewer or smaller blooms.
- Weak Immunity: Plants with inadequate nutrition are more susceptible to pests and diseases.
Using Natural Fertilisers
Natural fertilisers provide essential nutrients in an eco-friendly manner. Consider these options:
- Manure-Based Fertilisers: Granulated chicken or cow manure offers a slow-release source of nitrogen, phosphorus, and potassium.
- Compost: Rich in organic matter, compost improves soil fertility and promotes healthy root growth.
- Bone Meal: Provides phosphorus to support robust flowering.
Apply fertilisers in early spring and again during the flowering season to sustain growth.
The Role of Humic Acid
Humic acid plays a crucial role in enhancing nutrient uptake and soil health:
- Improved Nutrient Availability: Humic acid breaks down organic matter, releasing nutrients in a form easily absorbed by hydrangeas.
- Enhanced Soil Structure: It improves soil aeration and water retention, creating an ideal environment for roots.
- Microbial Activity: Encourages beneficial soil microbes, which further aid nutrient cycling.
Incorporate humic acid as part of your fertilisation routine for optimal results.
Benefits of Mulching
Mulching supports nutrient supply and overall plant health:
- Nutrient Recycling: Organic mulches like bark, wood chips, or grass clippings decompose over time, enriching the soil.
- Moisture Retention: Mulch helps retain soil moisture, reducing the need for frequent watering.
- Weed Suppression: By preventing weeds, mulch minimises competition for nutrients.
Apply a 5–7 cm layer of mulch around the base of the hydrangea, ensuring it does not directly touch the stem to prevent rot.
Tips for Avoiding Over-Fertilisation
While hydrangeas need regular fertilisation, excessive nutrient application can be detrimental:
- Avoid Too Much Nitrogen: High nitrogen levels encourage foliage growth at the expense of flowers.
- Follow Recommended Rates: Use the manufacturer’s guidelines to prevent over-fertilisation.
- Observe Plant Response: Adjust your fertilisation schedule based on how the plant is performing.
Providing proper nutrient supply is essential for hydrangea health and vibrant blooms. By using natural fertilisers, incorporating humic acid, and applying mulch, gardeners can create a nutrient-rich environment that supports growth and flowering. Balanced fertilisation practices ensure that hydrangeas remain a striking feature in the garden for years to come.
6. Correct Pruning for Hydrangeas: Timing and Techniques
Prune hydrangeas only in spring, after the risk of frost has passed. Garden hydrangeas bloom on old wood and should be cut back to the first strong bud pair. Panicle and smooth hydrangeas bloom on new wood and can be pruned heavily to encourage fresh growth and more flowers.
Pruning is a crucial part of hydrangea care, promoting healthy growth and vibrant blooms. However, hydrangeas should only be pruned in spring, contrary to popular belief that autumn pruning is suitable. This guide explains the correct timing, techniques, and considerations to protect hydrangeas from frost damage and ensure optimal flowering.
Why Spring Pruning is Essential
Hydrangeas are best pruned in spring, after the risk of frost has passed, typically around March. Here's why:
- Frost Recovery: Leaving stems unpruned during winter provides the plant with material to "sacrifice" in case of frost damage. This protects the main structure of the plant.
- Flower Protection: Old flower heads left on the plant act as a natural shield for the stems, reducing the risk of frost damage to new buds.
Avoid autumn pruning to prevent exposing the plant to unnecessary winter stress.
How to Prune Hydrangeas in Spring
Proper pruning techniques ensure healthy growth and abundant blooms:
- Wait for Frosts to Pass: Begin pruning only after the last frost, typically in early to mid-spring.
- Identify Dead Stems: Remove any stems that show no signs of green growth. These are typically brittle and brown.
- Cut Above Healthy Buds: Prune just above the first pair of strong, green buds. This encourages vigorous growth and blooming.
- Trim Old Flowers: Gently remove the spent flower heads without cutting too deeply into the stem.
Pruning Specific Hydrangea Types
Different hydrangea varieties have unique pruning needs:
- Garden Hydrangeas (Hydrangea macrophylla): Prune lightly, focusing on removing dead wood and spent flowers. Avoid heavy cuts into old wood.
- Panicle Hydrangeas (Hydrangea paniculata): These can be pruned more heavily in spring to encourage new growth and large flower clusters.
- Smooth Hydrangeas (Hydrangea arborescens): Cut back by about two-thirds in spring to stimulate fresh growth and robust blooms.
Common Mistakes to Avoid
To protect your hydrangeas and maximise flowering, avoid these mistakes:
- Pruning Too Early: Cutting before the last frost exposes the plant to potential frost damage.
- Over-Pruning: Excessive cutting reduces the number of flowering stems and weakens the plant.
- Autumn Pruning: Avoid pruning in autumn, as it removes the plant's natural frost protection and leaves it vulnerable during winter.
Correct pruning is essential for healthy, vibrant hydrangeas. By pruning in spring after the last frost, leaving old flower heads on during winter, and following species-specific techniques, you can protect your hydrangeas from frost damage and enjoy their stunning blooms throughout the growing season. Thoughtful pruning practices ensure your hydrangeas remain a beautiful feature in your garden for years to come.
7. The Benefits of Mulching for Hydrangeas
Apply organic mulch such as compost, bark, or grass clippings around the base. Mulching retains soil moisture, enriches the soil with nutrients, regulates temperature, and suppresses weed growth, all of which support healthy growth and flowering.
Mulching is a simple yet powerful practice that can significantly enhance the health and productivity of hydrangeas. From retaining soil moisture to providing nutrients, mulch plays a vital role in hydrangea care. This guide delves into the benefits of mulching and how to apply it effectively for optimal results.
What is Mulching?
Mulching involves covering the soil around plants with organic or inorganic materials. For hydrangeas, organic mulches such as compost, bark, wood chips, and grass clippings are particularly beneficial, as they improve soil quality over time.
Benefits of Mulching Hydrangeas
Mulching offers a range of advantages that directly support hydrangea growth and health:
- Moisture Retention: Mulch reduces water evaporation from the soil, ensuring consistent moisture levels that hydrangeas need for vibrant blooms.
- Weed Suppression: By blocking sunlight, mulch prevents weed growth, reducing competition for nutrients and water.
- Nutrient Enrichment: Organic mulches decompose over time, releasing nutrients that enhance soil fertility and support healthy plant growth.
- Temperature Regulation: Mulch acts as an insulating layer, keeping the soil cooler in summer and warmer in winter.
- Improved Soil Structure: Decomposing mulch encourages microbial activity, which improves soil aeration and nutrient cycling.
How to Mulch Hydrangeas
Applying mulch correctly is essential to maximise its benefits. Follow these steps:
- Choose the Right Mulch: Opt for organic materials such as shredded bark, wood chips, or compost, which provide long-term soil benefits.
- Prepare the Area: Remove weeds and debris from the base of the hydrangea to ensure a clean area for mulch application.
- Apply the Mulch: Spread a 5–7 cm layer of mulch evenly around the base of the hydrangea, ensuring it covers the root zone.
- Avoid Mulch Piling: Keep the mulch at least 5 cm away from the stem to prevent rot and pest infestations.
- Maintain the Mulch: Replenish the mulch layer annually or as needed to maintain its depth and effectiveness.
Types of Mulch for Hydrangeas
Different mulching materials offer unique benefits:
- Compost: Rich in nutrients, compost improves soil fertility and supports robust hydrangea growth.
- Shredded Bark: Long-lasting and visually appealing, bark mulch helps regulate soil temperature and suppress weeds.
- Grass Clippings: A readily available option that decomposes quickly, providing immediate nutrient benefits.
- Wood Chips: A durable choice that breaks down slowly, offering long-term soil improvement.
Common Mulching Mistakes to Avoid
Avoid these common pitfalls when mulching hydrangeas:
- Over-Mulching: Applying a layer thicker than 7 cm can trap excess moisture and lead to root rot.
- Mulch Contact with Stem: Direct contact between mulch and the hydrangea stem increases the risk of rot and pest problems.
- Using Inorganic Mulch: Materials like gravel or plastic sheeting do not decompose and fail to enrich the soil.
Mulching is a cornerstone of hydrangea care, providing essential benefits such as moisture retention, weed suppression, and nutrient enrichment. By selecting the right materials and applying mulch correctly, gardeners can ensure their hydrangeas thrive and produce stunning blooms year after year. Incorporate mulching into your hydrangea care routine for healthier, more vibrant plants.
8. Protecting Hydrangeas from Late Frosts
Late spring frosts can damage buds, reducing flowering. Cover the plant temporarily during frost warnings to protect the developing buds.
Late frosts can pose a significant risk to hydrangeas, particularly to their tender buds and new growth. Proper frost protection techniques are essential to safeguard your plants and ensure vibrant blooms. This guide outlines effective methods to protect hydrangeas from frost damage and maintain their health throughout the growing season.
Why Frost Protection is Important
Frost damage can have lasting effects on hydrangeas, impacting both their growth and flowering potential:
- Bud Damage: Frost can kill developing buds, reducing or eliminating blooms for the season.
- Stem Weakening: Repeated frost exposure weakens stems, making them more susceptible to breakage and disease.
By taking preventive measures, you can minimise these risks and support healthy plant development.
How to Protect Hydrangeas from Frost
Implement these steps to shield your hydrangeas from late frosts:
- Leave Old Flower Heads Intact: Allow old blooms to remain on the plant throughout winter. They act as a natural shield, protecting stems and buds from frost exposure.
- Use Frost Covers: On nights with frost warnings, cover the plants with frost cloth, burlap, or a bedsheet. Ensure the cover extends to the ground to trap warmth.
- Apply Mulch: Spread a 5–7 cm layer of organic mulch around the base of the plant to insulate the roots and maintain soil warmth.
- Relocate Potted Hydrangeas: For hydrangeas in containers, move them to a sheltered location, such as a garage or porch, during frost events.
Identifying and Treating Frost Damage
Despite precautions, frost damage may occasionally occur. Here's how to identify and address it:
- Signs of Frost Damage: Brown or blackened buds, wilted leaves, and brittle stems indicate frost injury.
- Treatment: Prune away damaged parts in spring after the last frost. This encourages new growth and prevents disease spread.
Timely intervention can help your hydrangeas recover and thrive.
Long-Term Frost Protection Strategies
Incorporate these practices into your hydrangea care routine for ongoing frost protection:
- Choose Hardy Varieties: Select frost-tolerant hydrangeas, such as panicle hydrangeas (Hydrangea paniculata), for colder climates.
- Plant in Sheltered Locations: Position hydrangeas near walls or fences that provide natural windbreaks and radiate heat during cold nights.
- Use Windbreaks: Install barriers or companion plants to reduce exposure to cold winds.
Protecting hydrangeas from late frosts is essential for maintaining their health and ensuring vibrant blooms. By leaving old flower heads intact, using frost covers, and applying mulch, you can minimise frost damage and support your plants through the growing season. With these preventive measures, your hydrangeas will thrive and reward you with stunning displays year after year.
9. Natural and Pollinator-Friendly Pest and Disease Management for Hydrangeas
Regularly inspect hydrangeas for pests like aphids and diseases such as powdery mildew. Use natural, pollinator-friendly treatments to maintain the plant's health while preserving the ecosystem.
Hydrangeas are generally resilient plants, but they can occasionally face challenges from pests and diseases. Using natural, pollinator-friendly methods ensures the health of your hydrangeas while protecting beneficial insects and maintaining ecological balance. This guide outlines effective techniques to keep your hydrangeas thriving.
Common Pests and Natural Remedies
Here are the most common pests that affect hydrangeas and natural ways to manage them:
-
Aphids: Tiny insects that suck sap from leaves and stems, leaving a sticky residue.
- Natural Solution: Spray the plant with a solution of water and a few drops of biodegradable dish soap to remove aphids. Rinse off with clean water after an hour.
- Attract Beneficial Insects: Ladybirds and lacewings are natural predators of aphids. Plant nectar-rich flowers nearby to encourage these helpful insects.
-
Slugs and Snails: These pests chew holes in leaves, particularly on younger plants.
- Natural Solution: Place crushed eggshells or coffee grounds around the base of the plant to deter slugs and snails.
- Physical Barriers: Use copper tape or place sand around the hydrangea as a natural deterrent.
-
Spider Mites: Tiny pests that cause stippling on leaves and fine webbing.
- Natural Solution: Spray the plant with a mixture of water and neem oil. Repeat every 7–10 days until the infestation subsides.
- Increase Humidity: Spider mites thrive in dry conditions. Regular misting can deter them while keeping the plant healthy.
Preventing Diseases Naturally
Fungal diseases like powdery mildew and leaf spot can affect hydrangeas. Use these eco-friendly strategies to prevent and manage them:
- Good Air Circulation: Ensure proper spacing between plants to reduce humidity levels and discourage fungal growth.
- Remove Infected Leaves: Prune and discard any leaves showing signs of disease to prevent spread. Avoid composting these leaves.
- Natural Fungicides: Spray a solution of baking soda (1 teaspoon) mixed with water (1 litre) and a few drops of vegetable oil. This creates an effective, pollinator-safe fungicide.
Companion Planting for Pest Control
Companion planting is a natural way to deter pests while supporting beneficial insects:
- Marigolds: Their strong scent repels aphids and other pests.
- Lavender: Attracts pollinators while deterring moths and whiteflies.
- Basil: Repels mosquitoes and other unwanted insects, making it a great addition near hydrangeas.
Encouraging Natural Predators
Creating a garden environment that attracts beneficial insects can significantly reduce pest problems:
- Ladybirds: Known for feeding on aphids, these insects thrive in gardens with diverse flowering plants.
- Lacewings: Attracted by plants like dill and cosmos, lacewings are effective predators of various pests.
- Bees: Essential pollinators, bees are drawn to hydrangeas and other flowering plants. Avoid chemical treatments that harm bees and their habitats.
Managing pests and diseases naturally is not only effective but also ensures your garden remains a safe and welcoming environment for pollinators. By using eco-friendly remedies, companion planting, and encouraging beneficial insects, you can protect your hydrangeas while supporting biodiversity. Embrace these sustainable practices for a thriving, vibrant garden.
10. Ensuring Proper Spacing for Hydrangeas
When planting, leave sufficient space between hydrangeas to ensure good air circulation. This reduces the risk of disease and promotes healthy growth.
Proper spacing is a fundamental aspect of hydrangea care that is often overlooked. Ensuring adequate distance between plants promotes air circulation, reduces the risk of disease, and supports optimal growth. This guide explores the importance of plant spacing and provides practical tips for designing a healthy hydrangea garden.
Why Proper Spacing is Important
Hydrangeas require space to grow and thrive. Proper spacing benefits your plants in several ways:
- Improved Air Circulation: Adequate spacing allows air to flow freely between plants, reducing humidity and the likelihood of fungal diseases such as powdery mildew and leaf spot.
- Optimal Sunlight Exposure: Well-spaced plants ensure that each hydrangea receives sufficient light, supporting even growth and vibrant blooms.
- Healthy Root Development: Spacing prevents competition for nutrients and water, encouraging strong and healthy root systems.
How to Determine the Right Spacing
The ideal spacing for hydrangeas depends on the specific variety and their mature size:
- Garden Hydrangeas (Hydrangea macrophylla): Space plants 1–1.5 metres apart to accommodate their broad, rounded growth habit.
- Panicle Hydrangeas (Hydrangea paniculata): Allow 1.5–2 metres between plants, as these varieties tend to grow taller and more upright.
- Smooth Hydrangeas (Hydrangea arborescens): Place plants 1–1.2 metres apart for compact yet bushy growth.
Always check the mature size of your specific variety to ensure sufficient space in your planting design.
Planning Your Hydrangea Garden
Incorporate spacing considerations into your garden layout for a balanced and healthy design:
- Group by Variety: Plant similar hydrangea types together to ensure uniform spacing and care requirements.
- Consider Companion Plants: Leave extra space if you plan to include companion plants, ensuring both hydrangeas and their neighbours have room to thrive.
- Allow for Growth: Account for the eventual size of each hydrangea when they reach maturity, leaving room for expansion.
Spacing and Disease Prevention
Proper spacing is one of the most effective ways to prevent disease in hydrangeas:
- Reduced Humidity: Good air circulation lowers humidity around the plants, making it harder for fungal spores to take hold.
- Easy Inspection: Spaced plants are easier to inspect for pests and diseases, allowing for quicker intervention when needed.
- Minimised Spread: In the event of a pest or disease outbreak, well-spaced plants reduce the risk of rapid spread.
Tips for Adjusting Spacing
If you’ve already planted hydrangeas too close together, consider these adjustments:
- Transplanting: Move overcrowded hydrangeas to a more spacious location during early spring or late autumn.
- Thinning: Prune overgrown plants to open up space and improve airflow.
- Smaller Varieties: Opt for dwarf hydrangea varieties if space is limited, as they require less room to grow.
Proper spacing is a simple yet vital element of hydrangea care, ensuring healthy growth, disease prevention, and a visually appealing garden. By planning your layout with sufficient room for each plant, you can create a thriving environment where hydrangeas flourish. With thoughtful spacing and attention to their needs, these stunning shrubs will reward you with beautiful blooms season after season.
Following these ten tips will help you achieve abundant blooms in your hydrangeas while maintaining their overall health. Proper care, from site selection to pruning and pest management, ensures these beautiful shrubs remain a standout feature in your garden.
About the Author

Richard Seres-Nagy is a passionate gardener with over 20 years of experience in hydrangea care. He founded Hydrangea Library to share expert advice, step-by-step guides, and practical tips for fellow gardening enthusiasts.
Read More
