Hydrangea Colour Manipulation Techniques
Learn how to manipulate hydrangea colours with easy and effective techniques. Change your blooms to vibrant blue, pink, or even purple hues.
Read MoreBlue hydrangeas are a beloved feature of gardens worldwide, known for their vibrant and captivating blooms. However, achieving the iconic blue colour is not merely a matter of planting the shrub; it requires specific soil conditions and diligent care. This guide will reveal the secrets of cultivating stunning blue hydrangeas, focusing on soil preparation, planting techniques, and maintenance tips.

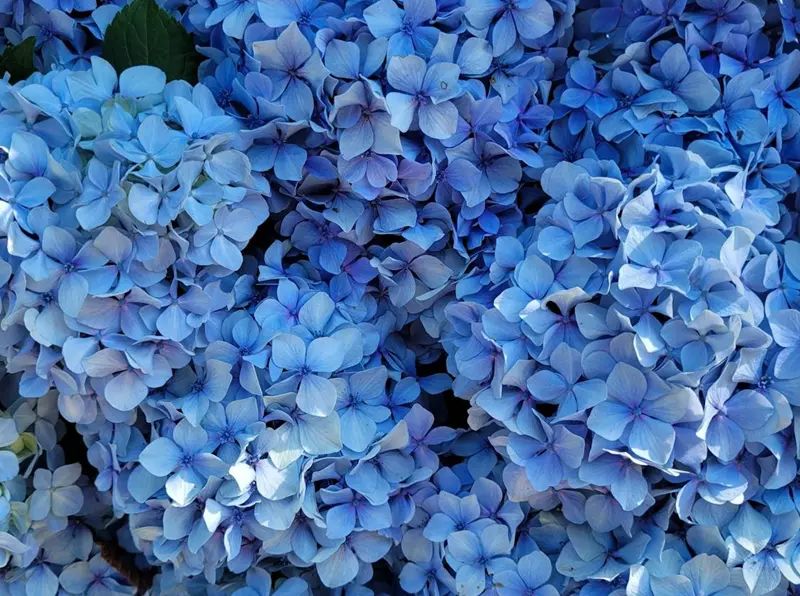
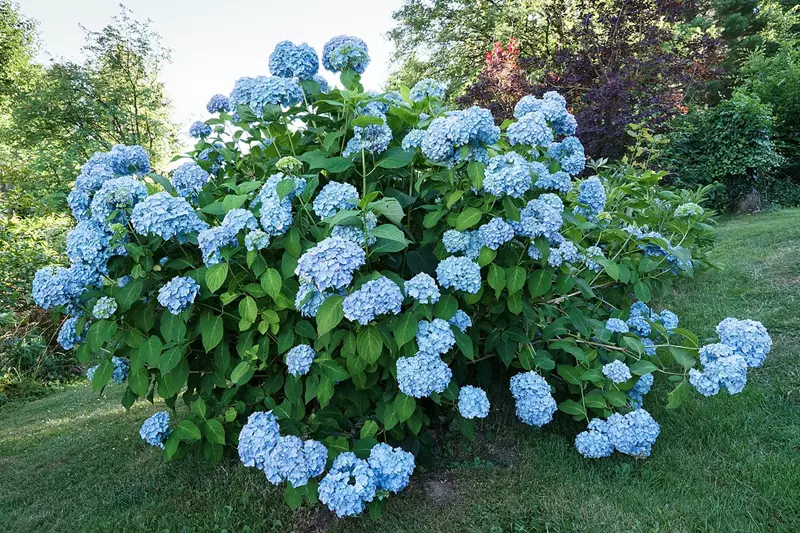
Blue hydrangeas are renowned for their striking, vibrant blooms that can add a splash of colour to any garden. Understanding the factors that influence their blue hue is essential for gardeners aiming to cultivate these beautiful flowers successfully.
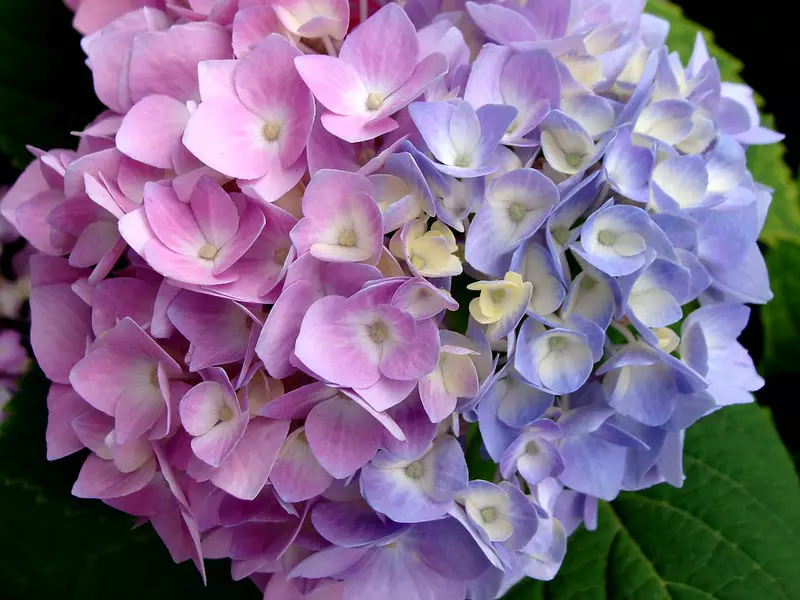
The colour of hydrangea blooms, particularly in Hydrangea macrophylla varieties, is largely determined by the pH level of the soil:
Maintaining an acidic soil environment is crucial for achieving and preserving the blue coloration in hydrangeas. Regular soil testing can help monitor pH levels and guide necessary amendments.
Aluminium plays a pivotal role in the development of blue hydrangea flowers. In acidic soils, aluminium becomes more soluble and accessible to the plant's roots, leading to blue pigmentation in the blooms. Conversely, in alkaline soils, aluminium is less available, resulting in pink flowers. Therefore, ensuring the presence of aluminium in the soil, combined with appropriate pH levels, is essential for blue hydrangea blooms.
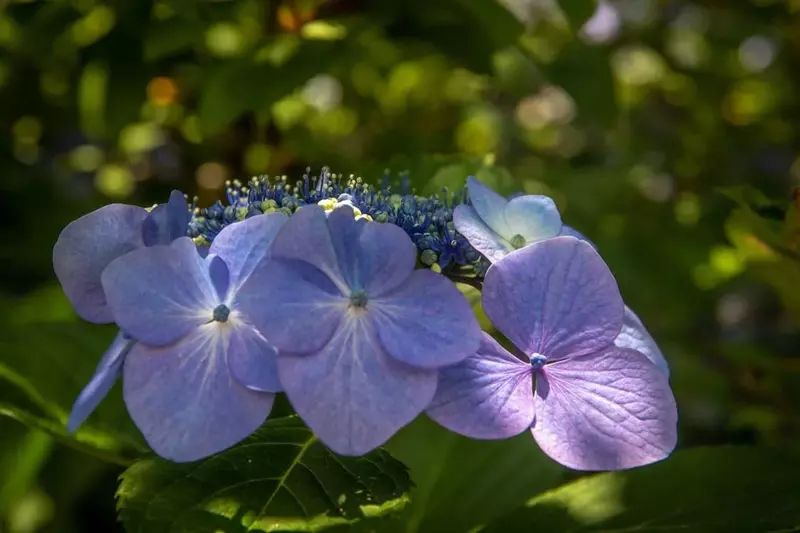
Not all hydrangea varieties have the potential to produce blue flowers. The ability to change colour based on soil pH is primarily found in Hydrangea macrophylla (bigleaf hydrangeas) and Hydrangea serrata (mountain hydrangeas). Other species, such as Hydrangea arborescens (smooth hydrangea) and Hydrangea paniculata (panicle hydrangea), typically produce white blooms that do not change colour with soil pH adjustments.
While soil pH and aluminium availability are primary determinants of bloom colour, other environmental factors can influence the intensity and shade of blue in hydrangea flowers:
Providing optimal growing conditions will enhance the vibrancy and longevity of blue hydrangea blooms.
To maintain the blue colour of hydrangea blooms:
Consistent care and monitoring will help preserve the desired blue hue in your hydrangeas.
Soil pH measures the acidity or alkalinity of the soil, ranging from 0 (highly acidic) to 14 (highly alkaline), with 7 being neutral. Hydrangeas exhibit blue flowers when grown in acidic soils with a pH below 5.5. In such conditions, aluminium ions become more available, which the plants absorb, leading to blue pigmentation in the blooms. Conversely, in neutral to alkaline soils (pH 6.0 and above), hydrangea flowers tend to be pink or red due to the decreased availability of aluminium.
Before planting, it's crucial to test your soil's pH to determine its current state. Home testing kits are readily available and provide quick results. Alternatively, local agricultural extension services can offer more comprehensive soil analyses.
To lower the soil pH and increase acidity:
While hydrangeas prefer moist soils, adequate drainage is vital to prevent root rot and other moisture-related issues. To enhance drainage:
Achieving the ideal soil conditions is just the beginning; maintaining them is crucial for the sustained health and colour of your blue hydrangeas.
By carefully preparing and maintaining the soil with attention to pH levels, aluminium availability, and drainage, gardeners can cultivate hydrangeas that showcase the desired vibrant blue blooms, enhancing the beauty of their gardens.
Selecting an appropriate site is vital for the successful growth of blue hydrangeas. Consider the following factors:
Preparing the soil properly sets the foundation for healthy growth:
Follow these steps to plant your blue hydrangea:
Proper care after planting ensures the hydrangea establishes well:
By following these guidelines, you can successfully plant and establish blue hydrangeas, enhancing your garden with their stunning blue blossoms.
Hydrangeas require consistent soil moisture, especially during dry spells. The following tips can help ensure proper hydration:
Fertilisation supports the growth and vibrant blooms of blue hydrangeas. Here’s how to do it right:
Pruning helps maintain the plant's shape and encourages healthy growth. Follow these steps:
Maintaining the blue colour of hydrangeas requires attention to soil acidity:
Hydrangeas are susceptible to pests and diseases. Regular monitoring and proactive care can prevent issues:
In colder climates, hydrangeas benefit from extra protection during the winter months:
Proper care and maintenance are key to enjoying the stunning beauty of blue hydrangeas year after year. By following these guidelines, gardeners can ensure their plants remain healthy, vibrant, and a highlight of their gardens.
Blue hydrangeas typically bloom on old wood, meaning the buds for the next season's flowers develop on the previous year's growth. Understanding this growth pattern is crucial, as improper pruning can remove these buds and result in reduced flowering.
The ideal time to prune blue hydrangeas is immediately after they have finished flowering, usually in late summer. This timing allows the plant sufficient time to develop new growth and set buds for the following year. Pruning too late in the season can remove these developing buds, leading to a lack of blooms in the next cycle.
Effective pruning involves several key steps:
When pruning blue hydrangeas, consider the following:
Pruning blue hydrangeas is a straightforward process that, when done correctly, promotes healthy growth and abundant flowering. By understanding their growth habits and adhering to proper pruning techniques, you can enjoy the full beauty of these stunning plants year after year.
In alkaline soils, aluminium becomes less available to plants, leading to pink or red hydrangea blooms. Maintaining blue flowers in such conditions requires specific interventions to increase soil acidity and enhance aluminium availability.
Begin by testing your soil's pH to determine its alkalinity. Soil testing kits are widely available and provide a baseline for necessary amendments.
To lower soil pH, consider the following amendments:
Follow product instructions carefully to avoid over-application, which can harm plants.
Adding organic materials can help lower soil pH:
Applying an acidic mulch, such as pine bark or pine needles, can help maintain lower soil pH levels.
Consistently monitor soil pH and adjust your amendments as necessary to maintain the desired acidity for blue hydrangea blooms.
If adjusting the pH of your garden soil proves challenging, consider planting hydrangeas in containers. This allows for complete control over soil composition, ensuring optimal conditions for blue flowers.
Maintaining blue hydrangea blooms in alkaline soil requires deliberate soil management to increase acidity and aluminium availability. Through soil amendments, organic matter incorporation, and regular monitoring, you can achieve and enjoy the desired blue hues in your hydrangeas.
Before pruning, it's crucial to determine whether your hydrangea blooms on old wood (last year's growth) or new wood (current year's growth). Most blue hydrangeas in the UK are Hydrangea macrophylla, which flower on old wood.
For blue hydrangeas that bloom on old wood, the ideal pruning period is:
Follow these steps to prune your blue hydrangeas effectively:
In the UK's climate, it's advisable to leave the dried flower heads on the plant throughout winter. They provide frost protection for the tender buds below. Pruning can then be completed in late winter or early spring, removing the old flower heads to just above a pair of healthy buds.
Pruning blue hydrangeas at the appropriate time is vital for their health and flowering. By pruning immediately after flowering and following proper techniques, you can ensure your hydrangeas remain vibrant and productive year after year.
Blue hydrangeas (Hydrangea macrophylla) are renowned for their vibrant blue blooms, which are influenced by soil acidity and the availability of aluminium ions. To maintain their health and enhance flowering, providing appropriate nutrients through organic fertilisers is essential.
Organic fertilisers offer several advantages for blue hydrangeas:
Well-decomposed compost enriches the soil with essential nutrients and improves moisture retention. Apply a 2-3 inch layer around the base of the plant in spring.
This balanced organic fertiliser provides nitrogen, phosphorus, and potassium, promoting healthy growth and flowering. Apply according to package instructions in early spring.
Rich in trace minerals, seaweed extract enhances plant vitality and stress resistance. Use as a foliar spray or soil drench during the growing season.
Used coffee grounds can slightly acidify the soil, supporting blue flower pigmentation. Sprinkle them sparingly around the plant base and incorporate them into the soil.
Utilising organic fertilisers tailored to the needs of blue hydrangeas fosters robust growth and vibrant blue flowers. By selecting appropriate organic amendments and adhering to proper application practices, gardeners can enhance the beauty and health of their blue hydrangeas.
Powdery mildew presents as a white or grayish powdery coating on leaves, stems, and flowers. It thrives in warm, humid conditions and can inhibit photosynthesis, leading to weakened plants.
Leaf spot diseases, such as Cercospora leaf spot and anthracnose, cause brown or black spots on hydrangea leaves, leading to reduced plant vigour and aesthetics.
Root rot is often caused by overwatering or poorly drained soils, leading to wilting, yellowing leaves, and eventual plant decline.
Ensure adequate spacing between plants to promote air circulation, reducing humidity levels that favour fungal growth. Regular pruning of dense foliage also enhances airflow.
Water at the base of the plant to keep foliage dry, as wet leaves can encourage disease development. Irrigate in the morning to allow any moisture on leaves to dry throughout the day.
Plant hydrangeas in well-draining soil to prevent waterlogging, which can lead to root rot. Incorporate organic matter to improve soil structure and drainage.
Apply a 2-3 inch layer of organic mulch around the base of the plant to regulate soil moisture and temperature, and to reduce soil-borne diseases.
If diseases are detected early, applying appropriate fungicides can help manage and prevent their spread. Always follow the manufacturer's instructions and consider organic options when available.
Regularly inspect your hydrangeas for signs of disease or pest infestation. Early detection and treatment are key to preventing problems from escalating.
By implementing these preventive measures and maintaining vigilant care, you can significantly reduce the risk of common diseases affecting your blue hydrangeas, ensuring they remain healthy and vibrant throughout the growing season.
When selecting companion plants for blue hydrangeas, consider the following factors:
Hostas are shade-loving perennials with lush, broad leaves that complement the delicate blooms of blue hydrangeas. Their foliage provides a contrasting texture, enhancing the visual appeal of the garden.
Ferns thrive in similar shady, moist environments as hydrangeas. Their feathery fronds add a delicate texture that contrasts beautifully with hydrangea blossoms.
Astilbes produce feathery plumes of flowers in shades of pink, white, and red, providing a striking contrast to blue hydrangeas. They prefer moist, well-drained soil and partial shade, making them excellent companions.
This ornamental grass offers graceful, arching foliage that adds movement and a contrasting form to hydrangea plantings. It thrives in partial shade and moist, well-drained soil.
These acid-loving shrubs share similar soil preferences with blue hydrangeas. Their spring blooms provide seasonal interest before hydrangeas come into flower.
With a variety of foliage colours ranging from deep purple to lime green, coral bells add year-round interest and contrast to hydrangea plantings. They prefer partial shade and well-drained soil.
Bleeding heart produces heart-shaped pink or white flowers in spring, complementing the early growth of hydrangeas. It thrives in shady, moist conditions similar to those preferred by hydrangeas.
By thoughtfully selecting companion plants that share similar growing conditions and offer complementary aesthetics, you can create a dynamic and thriving garden space where blue hydrangeas and their plant partners flourish together.
There are several techniques for propagating hydrangeas:
Early autumn is the best time to take hydrangea cuttings, as the plant is actively growing and conditions are optimal for rooting.
Choose a healthy, non-flowering stem with at least one leaf node. The cutting should be approximately 6 inches (15 cm) long.
Cover the pot with a clear plastic bag to retain humidity. Ensure the plastic does not touch the leaves to prevent fungal issues.
Place the pot in a location with indirect sunlight. Keep the soil consistently moist but not waterlogged. Roots typically develop within a few weeks.
Once the cutting has developed a strong root system, it can be transplanted into a larger pot or directly into the garden. Gradually acclimatise the plant to outdoor conditions.
Choose a flexible, low-growing stem that can be easily bent to the ground without breaking.
Ensure the soil remains moist around the buried section. Roots should develop within a few months. Once rooted, the new plant can be separated from the parent and transplanted.
Division is less commonly used for Hydrangea macrophylla, but it is effective for species like smooth hydrangeas (Hydrangea arborescens).
Early spring or autumn is the best time to divide hydrangeas.
Propagating blue hydrangeas is a rewarding process that allows you to grow more of these beautiful plants. By following these methods, you can successfully expand your hydrangea collection and enhance your garden's beauty.
In early spring, remove any dead or damaged stems to encourage new growth. Avoid heavy pruning, as Hydrangea macrophylla blooms on old wood, and excessive cutting can reduce flowering.
Apply a layer of organic mulch, such as well-rotted manure or compost, around the base of the plant to retain moisture and suppress weeds.
Feed with a balanced, slow-release fertiliser formulated for acid-loving plants to promote healthy growth and vibrant blooms.
Ensure consistent moisture, especially during dry spells. Water deeply at the base to encourage deep root growth, and consider using rainwater to maintain soil acidity, which helps keep the flowers blue.
Remove spent blooms to encourage further flowering and maintain the plant's appearance. Cut just above the first set of healthy leaves beneath the flower head.
Protect plants from intense midday sun to prevent wilting. Providing partial shade during the hottest part of the day can help maintain flower colour and plant health.
To maintain blue flower colour, ensure soil pH remains between 5.2 and 5.5. Apply aluminium sulphate as per product instructions to acidify the soil if necessary.
Avoid pruning in autumn, as this can remove flower buds for the next season. Instead, wait until early spring to remove any dead or damaged wood.
Refresh the mulch layer to insulate roots against temperature fluctuations and retain soil moisture.
In colder regions, protect plants from frost by covering them with horticultural fleece or burlap. This helps prevent bud damage and ensures a healthy bloom in the following season.
Reduce watering during dormancy but ensure the soil does not dry out completely. Maintain slight moisture to protect the root system.
Refrain from pruning in winter, as flower buds are formed on old wood. Wait until early spring to remove any winter-damaged stems.
By following these seasonal care tips, you can ensure that your blue hydrangeas thrive in the UK climate, providing beautiful blooms throughout the growing season. Regular maintenance tailored to each season's specific needs will keep your plants healthy and vibrant year after year.
Soil pH measures the acidity or alkalinity of the soil on a scale from 0 to 14, with 7 being neutral. Hydrangeas are unique in that their flower colour can change based on the soil's pH level:
Before making any adjustments, it's crucial to determine your soil's current pH level.
To encourage blue flowers, the soil should be acidic, ideally with a pH between 5.2 and 5.5.
Adding organic materials can help lower soil pH:
For more immediate results, consider:
Note: Always follow manufacturer instructions when applying these products to avoid over-application, which can harm plants.
Once the desired pH is achieved, it's important to maintain it:
In the UK, soil types vary widely:
Achieving and maintaining blue hydrangea blooms requires careful management of soil pH. By understanding your soil's current pH, making appropriate amendments, and maintaining acidic conditions, you can enjoy the vibrant blue flowers that make hydrangeas a garden favourite.
Selecting the appropriate blue hydrangea variety is crucial for achieving the desired landscape effect. Here are some popular options:
Blue hydrangeas thrive in well-drained, moist, and fertile soil with a pH between 5.2 and 5.5 to maintain their blue coloration. Incorporate organic matter, such as compost or well-rotted manure, to improve soil structure and fertility. Ensure the planting site receives morning sun and afternoon shade to protect the blooms from intense sunlight.
Plant blue hydrangeas along the foundation of your home to soften architectural lines and add colour. Their rounded form and lush foliage provide a welcoming appearance.
Incorporate blue hydrangeas into mixed shrub and perennial borders. Their blue blooms contrast beautifully with plants like white roses, pink peonies, or silver-foliaged plants, creating a harmonious colour palette.
Blue hydrangeas are well-suited for woodland settings, where dappled shade and rich, moist soil mimic their natural habitat. Combine them with ferns, hostas, and other shade-loving plants for a lush, layered effect.
For patios or small gardens, blue hydrangeas can be grown in large containers filled with ericaceous compost to maintain soil acidity. This allows for flexibility in placement and adds a splash of colour to hardscape areas.
Selecting suitable companion plants enhances the beauty of blue hydrangeas and contributes to a cohesive landscape design. Consider the following companions:
Proper maintenance ensures blue hydrangeas remain healthy and vibrant:
Incorporating blue hydrangeas into your landscape design adds timeless beauty and elegance. By selecting appropriate varieties, preparing the site, and considering companion plants, you can create a harmonious and visually appealing garden space that showcases the captivating allure of blue hydrangeas.
Hydrangeas are moisture-loving plants that require consistent watering, especially during the summer when evaporation rates are higher. However, overwatering can lead to root rot, while underwatering may cause wilting and reduced bloom quality.
The frequency of watering blue hydrangeas in summer depends on various factors, including weather conditions, soil type, and plant maturity. As a general guideline:
Watering hydrangeas in the early morning is ideal, as it allows the plants to absorb moisture before the heat of the day, reducing the risk of wilting. Avoid watering during the evening to prevent prolonged leaf wetness, which can encourage fungal diseases.
Applying a 2-3 inch layer of organic mulch around the base of hydrangeas helps retain soil moisture, regulate soil temperature, and reduce weed competition. Materials such as pine bark or compost are effective choices.
During periods of intense heat or drought, increase watering frequency to prevent stress. Conversely, reduce watering during cooler, rainy periods to avoid waterlogged soil. Always monitor soil moisture and adjust accordingly.
Maintaining an appropriate watering schedule for blue hydrangeas during the summer is essential for their health and vibrant blooms. By following these guidelines and adjusting for specific environmental conditions, you can ensure your hydrangeas thrive throughout the season.
Cultivating blue hydrangeas requires careful attention to soil acidity, proper planting techniques, and consistent maintenance. By understanding their unique needs and following these guidelines, you can enjoy the mesmerising beauty of blue hydrangeas in your garden year after year.

Learn how to manipulate hydrangea colours with easy and effective techniques. Change your blooms to vibrant blue, pink, or even purple hues.
Read More
Discover the beauty and care techniques for Hydrangea macrophylla 'Nikko Blue'. Learn how to grow, maintain, and enjoy this stunning blue-flowering hydrangea.
Read More
Discover the beauty of Hydrangea macrophylla 'Blue Wave'. Learn about its care, soil pH requirements, pruning tips, and how to enhance its stunning blooms.
Read More