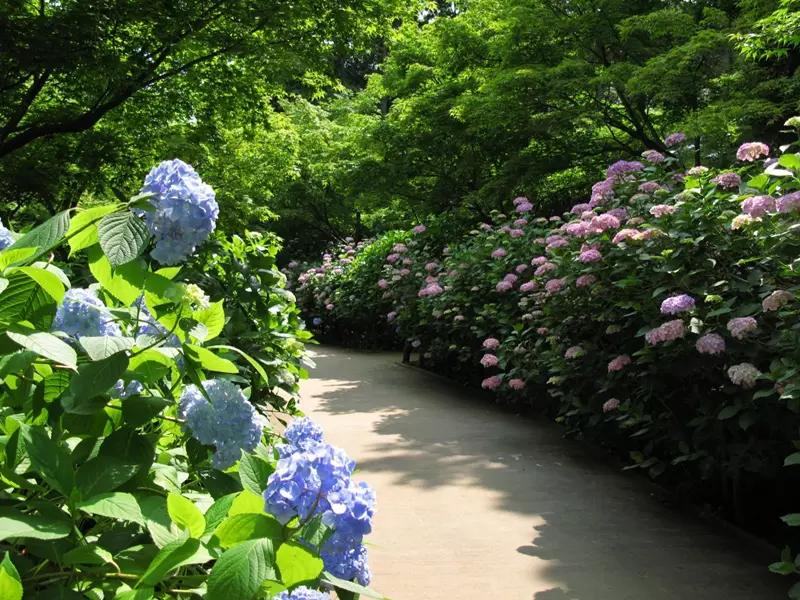
Hydrangea Varieties for Urban Gardens
Explore the best hydrangea varieties for urban gardens in the UK, including their unique features and benefits for city environments.
Read MoreHydrangea petiolaris, commonly known as the climbing hydrangea, is a vigorous and versatile vine that brings elegance to gardens and landscapes. With its lush green foliage and stunning clusters of white, lacecap flowers, it is a popular choice for gardeners looking to cover walls, fences, or pergolas. This article explores the origins, characteristics, and ideal growing conditions for this unique hydrangea, helping you determine if it’s the right choice for your garden.
Native to the woodlands of East Asia, including Japan, Korea, and parts of Russia, Hydrangea petiolaris thrives in shaded or partially shaded environments. Its natural habitat includes forested areas where it climbs trees and rocky outcrops, making it well-adapted to both vertical and horizontal growth.
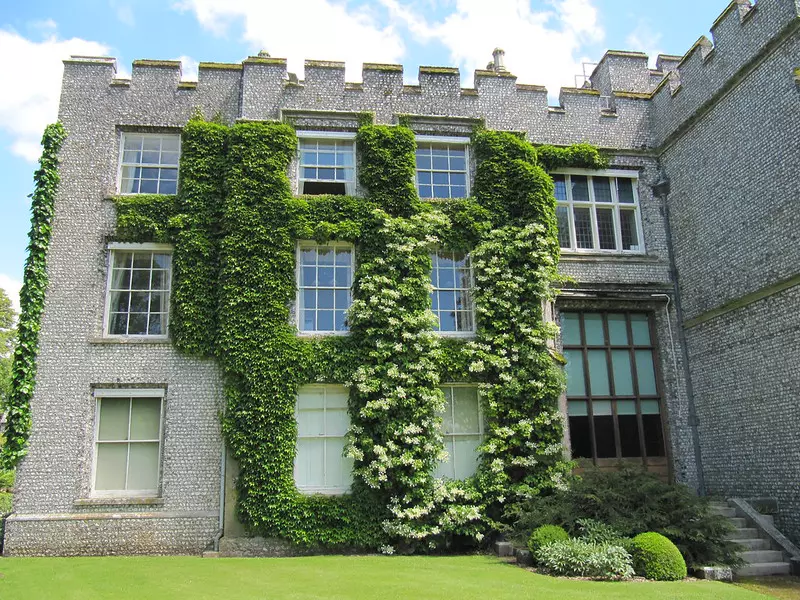
Hydrangea petiolaris is notable for its distinctive features:
To ensure healthy growth and vibrant blooms, Hydrangea petiolaris needs the following conditions:
Prefers partial to full shade but can tolerate sunnier locations if the soil remains consistently moist.
Thrives in fertile, well-draining soil with a slightly acidic to neutral pH (5.5–7.0). Add compost or organic matter to enrich the soil if necessary.
Requires regular watering during dry spells, particularly in the first few years after planting. Mulching helps retain soil moisture.
Needs a sturdy surface to climb, such as walls, fences, trellises, or trees. Its aerial rootlets attach firmly to most surfaces, providing excellent coverage.
The climbing hydrangea is highly versatile and suits a variety of garden settings:
Hydrangea petiolaris is an excellent choice for:
While the standard climbing hydrangea is the most commonly grown, there are a few notable varieties:
Hydrangea petiolaris is slow to establish, often taking 2–3 years to anchor itself securely. Once established, its growth rate increases, and it can reach heights of up to 20 metres within 5–10 years. Regular watering and fertilising during the early years can speed up growth.
Minimal care is needed to keep Hydrangea petiolaris thriving:
Hydrangea petiolaris is a stunning and versatile choice for any garden, offering a combination of elegance and practicality. Whether used to cover walls, climb trees, or adorn pergolas, this climbing hydrangea adds beauty and character to any space. With proper care and the right growing conditions, it will reward gardeners with years of lush foliage and charming blooms.
The Hydrangea petiolaris is a beautiful and versatile plant that adds charm to walls, fences, and pergolas. Planting it correctly ensures healthy growth and long-lasting blooms. In this guide, you’ll learn step-by-step how to plant Hydrangea petiolaris, including the most important preparation tips and aftercare practices.
Proper preparation is crucial for successful planting. Follow these steps to get started:
No matter the season or weather, hydrating the plant before planting is a vital step to ensure its survival and proper establishment.
This step ensures that the plant’s root ball is well-moistened, reducing the risk of transplant shock and helping the roots establish more effectively.
Once the plant is hydrated, follow these steps to plant it successfully:
Proper aftercare is essential for helping your Hydrangea petiolaris establish and thrive. Follow these tips:
Avoid these common errors to ensure the success of your climbing hydrangea:
Planting Hydrangea petiolaris correctly is essential for its long-term health and beauty. By hydrating the plant thoroughly, choosing the right location, and following these detailed planting steps, you set the stage for a flourishing climbing hydrangea. With proper aftercare, this stunning plant will enhance your garden for years to come.
The climbing hydrangea is a low-maintenance plant that requires minimal pruning. However, strategic pruning can help shape the plant, control its growth, and encourage new branching for a fuller appearance. This guide explains when and how to prune your climbing hydrangea to enhance its beauty and functionality in your garden.
In general, Hydrangea petiolaris does not require regular pruning to thrive. It is a naturally self-clinging climber that adapts well to most structures. However, there are instances where pruning is beneficial:
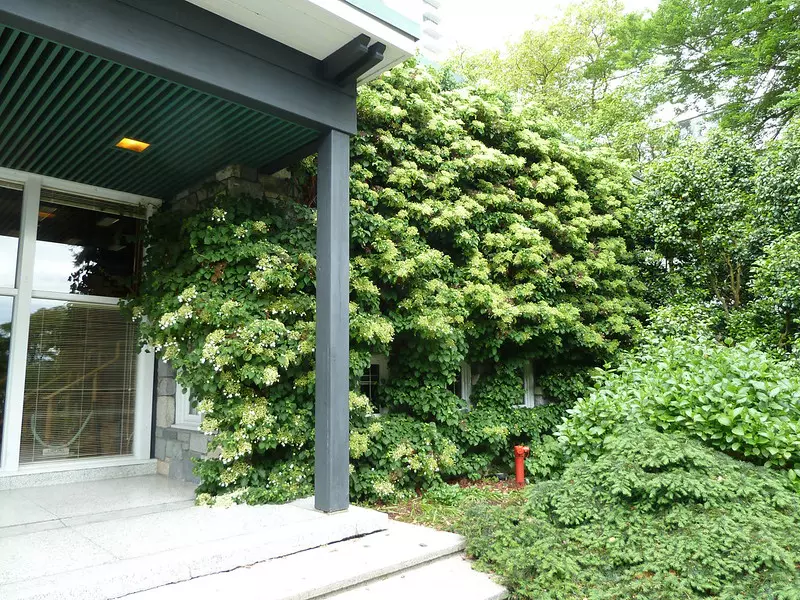
The best time to prune Hydrangea petiolaris is:
Avoid heavy pruning in late autumn or early spring, as this can reduce flowering and stress the plant.
Follow these steps to prune your climbing hydrangea effectively:
Direct the plant’s growth by cutting back stems that stray from the desired structure. Focus on:
Trim long, leggy stems to just above a pair of strong buds. This will encourage branching and create a denser, more compact plant.
If the plant becomes overgrown, cut back up to one-third of the oldest stems to ground level. This rejuvenates the plant and promotes fresh growth.
Identify and remove any dead, diseased, or damaged branches. Cut them back to healthy wood or the base of the plant.
Hydrangea petiolaris can be trained to grow on a variety of structures. Here are some ideas and tips:
The plant’s aerial rootlets attach firmly to walls and fences. Guide its growth horizontally or vertically to create a lush, green covering.
Use climbing hydrangeas to adorn garden structures like pergolas and arches. Train the stems over the top for a cascading effect.
With careful pruning, you can shape Hydrangea petiolaris into a freestanding bush or standard form. Regular pruning helps maintain this shape.
Keep these tips in mind when pruning and training your climbing hydrangea:
While Hydrangea petiolaris does not require frequent pruning, thoughtful shaping and maintenance can enhance its beauty and functionality. Whether you’re training it to climb a wall, cover a pergola, or create a freestanding feature, proper pruning techniques will ensure a healthy, vibrant plant. With the right care, your climbing hydrangea will become a stunning focal point in your garden for years to come.
Hydrangea petiolaris, also known as climbing hydrangea, is a resilient and versatile plant that thrives when grown in the right soil conditions. Understanding its soil requirements and preferences can ensure healthy growth, vibrant blooms, and successful climbing. This guide provides detailed information on the ideal soil for Hydrangea petiolaris and tips for optimising its growing environment.
Hydrangea petiolaris is relatively adaptable but thrives best under certain soil conditions:
Climbing hydrangeas prefer fertile, well-draining soils. They perform well in the following types:
Hydrangea petiolaris prefers slightly acidic to neutral soil, with a pH range of 5.5–7. While its flower colour is not influenced by pH like some other hydrangeas, maintaining the right pH supports optimal nutrient absorption.
Well-draining soil is critical. Waterlogged soil can lead to root rot, while soil that dries out too quickly can stress the plant. Adding organic matter helps balance moisture levels.
Before planting Hydrangea petiolaris, take these steps to prepare the soil:
Once planted, maintaining soil health is essential for the long-term success of your climbing hydrangea. Here’s how:
If your Hydrangea petiolaris shows signs of stress, the soil may be the issue. Here are common problems and their solutions:
Symptoms: Yellowing leaves, wilting, and stunted growth. Roots may rot in overly wet soil.
Solution: Improve drainage by adding organic matter or planting on a slight slope to encourage runoff.
Symptoms: Pale or discoloured leaves and slow growth.
Solution: Apply a balanced fertiliser or amend the soil with compost to restore nutrients.
Symptoms: Poor nutrient uptake despite adequate fertilisation.
Solution: Use lime to raise soil pH or sulphur to lower it, depending on test results.
Providing the right soil conditions for Hydrangea petiolaris is key to its success as a stunning climbing plant. By ensuring fertile, well-draining soil and maintaining a slightly acidic pH, you can support healthy growth and vibrant blooms. With proper preparation and regular soil care, your climbing hydrangea will thrive and enhance your garden for years to come.
The Hydrangea petiolaris is a stunning vine that can be propagated to enhance your garden or share with others. While it takes time to establish, propagating this plant is a rewarding and cost-effective way to multiply its beauty. This article explores three reliable propagation methods: layering, cuttings, and division, with step-by-step instructions for each.
Propagating Hydrangea petiolaris offers several benefits:
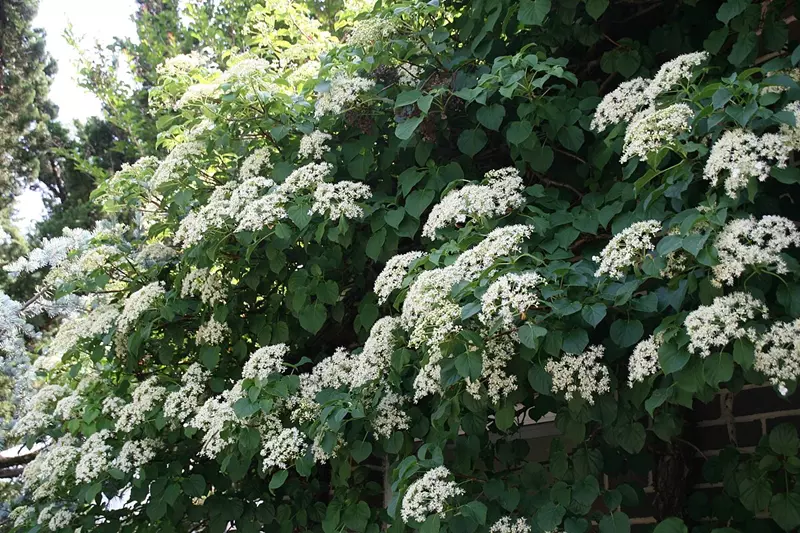
Here are three effective methods for propagating Hydrangea petiolaris:
Layering is the simplest and most reliable method for propagating climbing hydrangeas. It involves encouraging a branch to root while still attached to the parent plant.
Tip: Layering works best in spring or early summer when the plant is actively growing.
Propagating climbing hydrangeas from cuttings requires more effort but is an effective way to produce multiple new plants.
Division is a less common method for climbing hydrangeas but can be effective for mature plants with a spreading habit.
Note: Division is best done in early spring or autumn when the plant is dormant or experiencing slower growth.
Propagating Hydrangea petiolaris is a rewarding way to expand your garden or share this stunning plant with others. Whether you choose layering for simplicity, cuttings for mass production, or division for mature plants, each method offers an effective means of creating healthy new hydrangeas. With proper care and patience, your climbing hydrangea will thrive and bring beauty to your garden for years to come.
The climbing hydrangea is a hardy and versatile plant, but it still benefits from proper winter care. Preparing your hydrangea for the colder months ensures its health and resilience, particularly in regions with harsh winters. This guide covers the importance of mulching, the timing of pruning, and essential soil nutrients to support your climbing hydrangea through winter.
Mulching is one of the most critical steps in protecting Hydrangea petiolaris during winter. A thick layer of mulch insulates the roots, preventing temperature fluctuations and protecting against frost damage.
While pruning is essential for maintaining the shape and size of your climbing hydrangea, timing is key. For Hydrangea petiolaris, it’s best to delay pruning until spring.
Healthy soil plays a vital role in helping Hydrangea petiolaris endure winter. Ensuring the soil has the right balance of nutrients and structure is essential.
Beyond mulching and soil preparation, consider these additional measures to protect your climbing hydrangea:
Proper winter care is essential for maintaining the health and beauty of Hydrangea petiolaris. By applying a thick layer of mulch, delaying pruning until spring, and enriching the soil with essential nutrients, you can protect your climbing hydrangea from the harshest conditions. With these measures in place, your plant will thrive and reward you with lush growth and stunning blooms in the coming seasons.
Hydrangea petiolaris, or climbing hydrangea, is a hardy and resilient plant. However, like any garden favourite, it is not immune to certain diseases. Identifying, preventing, and treating these issues early can ensure a healthy, flourishing plant. This guide highlights common diseases affecting climbing hydrangeas, prevention tips, and effective treatment methods, both organic and conventional.
While generally robust, Hydrangea petiolaris can be affected by the following diseases:
Symptoms: A white, powdery substance on leaves and stems, causing distortion and yellowing over time.
Causes: High humidity, poor air circulation, and shaded areas encourage fungal growth.
Symptoms: Dark brown or black circular spots on leaves, often with yellow halos. Severe cases may result in leaf drop.
Causes: Fungal pathogens spread through water splash or poor air circulation.
Symptoms: Orange or rust-coloured spots on the undersides of leaves, with possible leaf distortion.
Causes: Fungal spores spread via wind or water.
Symptoms: Yellowing leaves, stunted growth, and wilting. Roots appear brown, mushy, and decayed.
Causes: Poor drainage or waterlogged soil creates conditions for fungal pathogens to thrive.
Prevention is the best defence against diseases. Implement these strategies to keep your climbing hydrangea healthy:
Prune regularly to thin out dense growth and improve airflow. Ensure the plant is not overcrowded by other vegetation.
Water at the base of the plant to avoid wetting the leaves. Use drip irrigation or soaker hoses to minimise water splash.
Enrich the soil with organic matter such as compost or aged manure. Ensure the soil is well-draining to prevent waterlogging.
Apply a 5–8 cm layer of organic mulch around the base of the plant to retain moisture, regulate temperature, and suppress weeds.
Inspect the plant weekly for signs of disease. Early detection allows for quicker intervention.
If your climbing hydrangea shows signs of disease, take immediate action. Here are some organic and conventional treatment methods:
Consistent care is essential for keeping your climbing hydrangea disease-free. Follow these practices for long-term health:
While Hydrangea petiolaris is a hardy and low-maintenance plant, it can occasionally be affected by diseases such as powdery mildew, leaf spot, and root rot. By adopting preventative measures, regularly monitoring your plant, and using effective organic or conventional treatments when needed, you can keep your climbing hydrangea healthy and thriving. With proper care, this elegant vine will reward you with years of stunning growth and blooms.
Hydrangea petiolaris is a resilient and visually stunning plant that can enhance walls, fences, and pergolas in any garden. While generally pest-resistant, it can occasionally face issues with common garden pests. Managing these pests in an eco-friendly manner ensures the health of your plant while protecting the environment. This guide provides natural prevention tips and effective organic treatments for keeping your climbing hydrangea pest-free.
Although relatively hardy, Hydrangea petiolaris may be affected by the following pests under certain conditions:
Symptoms: Small, soft-bodied insects cluster on new growth, leaving behind a sticky residue (honeydew) that can lead to sooty mould.
Causes: Warm, humid conditions and tender new shoots attract aphids.
Symptoms: Fine webbing, yellow speckling on leaves, and eventual leaf drop.
Causes: Hot, dry conditions encourage spider mite infestations.
Symptoms: Hard, shell-like bumps on stems and leaves, leading to weakened growth and sticky honeydew.
Causes: Stressful growing conditions such as drought or overcrowding.
Symptoms: Large, irregular holes in leaves, especially on younger plants.
Causes: Damp and shady conditions provide ideal environments for slugs and snails.
Prevention is the best way to manage pests while maintaining an eco-friendly garden. Follow these natural prevention tips to keep your climbing hydrangea healthy:
Introduce natural predators such as ladybirds, lacewings, and parasitic wasps, which feed on pests like aphids and spider mites. Plant companion plants like marigolds, dill, or fennel nearby to attract these beneficial insects.
Regularly prune dense growth to reduce humidity around the plant, discouraging pests like spider mites.
Water at the base of the plant to keep foliage dry and avoid creating conditions that attract pests. Use drip irrigation or soaker hoses for efficiency.
Use a layer of organic mulch to retain moisture and regulate soil temperature, reducing stress on the plant and discouraging pests like slugs.
Check your hydrangea weekly for signs of pest activity. Early detection makes management easier and more effective.
If pests are already present, take immediate action using these organic and eco-friendly solutions:
Neem oil is a natural pesticide that works against aphids, spider mites, and scale insects. Mix neem oil with water according to the manufacturer’s instructions and spray on affected areas. Repeat weekly until the infestation is controlled.
Mix 1 tablespoon of liquid soap with 1 litre of water and spray directly on pests. This solution suffocates soft-bodied insects like aphids and spider mites.
Remove scale insects and slugs by hand. For scale insects, use a cotton swab dipped in rubbing alcohol to dislodge them from stems and leaves.
Sprinkle food-grade diatomaceous earth around the base of the plant to deter slugs and other crawling pests. This natural powder damages their exoskeletons, leading to dehydration.
For slugs and snails, place shallow dishes filled with beer near the hydrangea. Slugs are attracted to the beer and become trapped.
Consistent care ensures a pest-free climbing hydrangea. Follow these practices for long-term success:
Eco-friendly pest management for Hydrangea petiolaris protects your plant while maintaining a healthy, sustainable garden. By combining preventative measures, natural remedies, and consistent care, you can effectively manage pests without resorting to harmful chemicals. With proper attention, your climbing hydrangea will thrive and continue to enhance your garden’s beauty for years to come.
Climbing hydrangea is a versatile and elegant addition to any garden. Its self-clinging nature and beautiful white blooms make it ideal for walls, fences, and pergolas. Companion planting with climbing hydrangeas enhances their aesthetic appeal, supports plant health, and creates a dynamic garden design. This guide explores the best companion plants and strategies for pairing them with Hydrangea petiolaris.
Companion planting involves grouping plants with complementary characteristics to promote healthy growth and aesthetic harmony. The benefits of companion planting for Hydrangea petiolaris include:
When selecting companion plants for climbing hydrangeas, consider their growing requirements. Choose plants that thrive in partial to full shade with well-draining soil. Below are excellent companion options:
Incorporating companion plants into your garden design requires thoughtful planning. Here are some tips:
Arrange plants by height, with taller companions like foxgloves at the back, climbing hydrangeas on vertical structures, and low-growing ground covers in the foreground.
Combine plants with complementary or contrasting colours. For example, pair the hydrangea’s white blooms with plants featuring purple, pink, or golden hues.
Use a mix of textures, such as the bold leaves of hostas, the feathery plumes of astilbes, and the soft fronds of ferns, to create visual interest.
Select companions that bloom at different times to ensure continuous colour and texture throughout the year.
Maintain the health of both hydrangeas and their companions with these care tips:
Companion planting with Hydrangea petiolaris not only enhances its visual appeal but also supports a healthy and thriving garden ecosystem. By choosing the right plants, varying textures and heights, and maintaining proper care, you can create a harmonious garden design that showcases the climbing hydrangea’s beauty. With thoughtful planning, your garden will become a dynamic and captivating space.
Hydrangea petiolaris is a unique and versatile plant that brings both structure and elegance to garden spaces. Its self-clinging growth habit, lush green foliage, and stunning clusters of white lacecap flowers make it an excellent choice for vertical gardening. This guide explores creative ways to use climbing hydrangeas in garden design, offering practical tips and inspiration for your landscape.
Climbing hydrangeas are ideal for gardeners seeking a low-maintenance yet visually impactful plant. Their key benefits include:
Hydrangea petiolaris is incredibly versatile, suiting various garden styles and layouts. Here are some creative ways to include it in your design:
Use climbing hydrangeas to transform vertical spaces into lush, green backdrops. Their self-clinging nature makes them perfect for:
When left unsupported, Hydrangea petiolaris can act as a dense ground cover, spreading across open areas to suppress weeds and fill bare spaces.
Incorporate climbing hydrangeas into woodland gardens alongside ferns, hostas, and other shade-loving plants for a cohesive, natural look.
With proper pruning and support, climbing hydrangeas can be shaped into free-standing forms or trained onto obelisks, adding height and drama to garden beds.
To make the most of Hydrangea petiolaris in your garden, consider these design tips:
Choose locations with sturdy structures for climbing and ensure adequate space for the plant to grow and spread.
Pair climbing hydrangeas with shade-loving perennials like astilbes, bleeding hearts, and ferns for layered interest.
Use climbing hydrangeas in areas where their winter bark, summer blooms, or autumn foliage will be most appreciated.
Highlight the hydrangea’s blooms and foliage with subtle lighting to create a stunning display at night.
To ensure your climbing hydrangea thrives, follow these care tips:
Avoid these common pitfalls to ensure your climbing hydrangea thrives:
Hydrangea petiolaris is a versatile and striking plant that enhances any garden design. Whether used for vertical gardening, ground cover, or as a feature plant, it adds structure, texture, and year-round interest to your landscape. By incorporating thoughtful design principles and providing proper care, you can enjoy the beauty and functionality of climbing hydrangeas for years to come.

Explore the best hydrangea varieties for urban gardens in the UK, including their unique features and benefits for city environments.
Read More
A comprehensive guide on planting and caring for hydrangeas, covering site selection, soil preparation, planting steps, watering, fertilising, pruning, and pest management.
Read More
Discover the Hydrangea serrata 'Euphoria Pink', a stunning variegated hydrangea with vibrant pink blooms. Learn about its characteristics, cultivation, and care in this comprehensive guide.
Read More