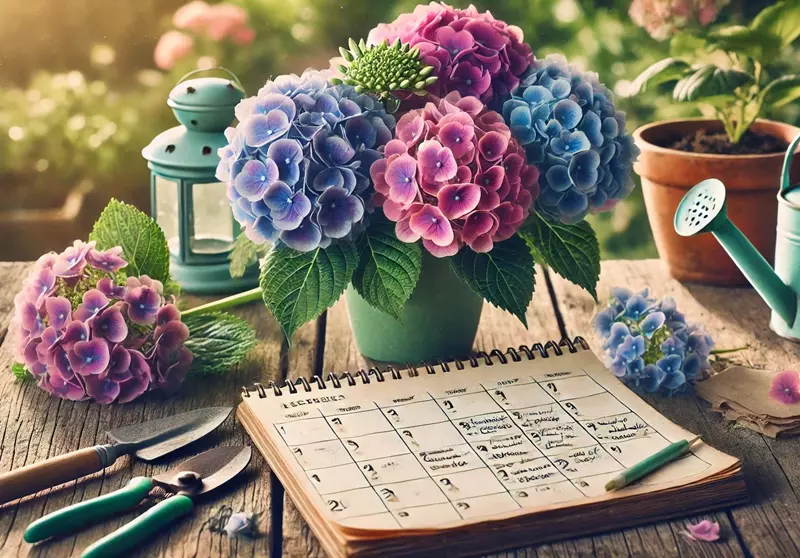
Annual Hydrangea Care Calendar
A comprehensive month-by-month hydrangea care calendar to ensure your plants thrive throughout the year.
Read MoreFOLLOW US:


Hydrangeas are popular flowering shrubs known for their stunning blooms and versatility in gardens. Whether you're planting them as standalone features or as part of a larger landscape, understanding the correct planting and care techniques is essential to ensure healthy growth and vibrant flowers.
Start here: Want a month-by-month plan, not just tips? Use our Hydrangea Care Calendar (watering, feeding, pruning, and winter protection—by season).
Also useful: Not sure which hydrangea type to plant? See the 10 most loved hydrangea varieties across the USA (great picks by sun, size, and bloom style).

Selecting the appropriate site for planting hydrangeas is crucial to ensure their healthy growth and vibrant blooms. This guide delves into the key factors to consider when choosing the perfect location for your hydrangeas.
Hydrangeas' light needs vary among species:
The soil plays a pivotal role in the health of hydrangeas:
Creating the ideal soil environment for hydrangeas involves more than just selecting the right planting location. One effective method for improving soil conditions is incorporating diatomaceous earth for hydrangeas into the soil. This natural substance enhances drainage, improves soil aeration, and helps regulate moisture levels—key factors in promoting healthy root development.
In addition to preventing soil compaction, diatomaceous earth contributes to a healthier growing medium by supporting beneficial soil microbes. When combined with organic matter such as compost or well-rotted manure, it further enriches the soil, ensuring optimal fertility and structure for robust hydrangea growth.
For gardeners seeking to optimise their hydrangea planting and care, integrating diatomaceous earth into soil preparation can provide long-term benefits, helping to maintain well-draining, nutrient-rich soil that supports vibrant blooms and lush foliage.
Consistent moisture is vital for hydrangeas:
Wilting hydrangea flowers can be a sign of insufficient hydration, intense heat exposure, or inadequate soil conditions. If your hydrangeas struggle with wilting, follow these essential steps to revive them:
Safeguarding hydrangeas from harsh environmental conditions is crucial:
Hot & humid climate? If your summers are both hot and humid, variety choice matters a lot. See our practical guide: Best Hydrangeas for Hot, Humid Climates (Disease-Resistant).
Selecting the optimal site for your hydrangeas involves careful consideration of light exposure, soil conditions, moisture levels, and protection from environmental factors. By addressing these elements, you can create an environment where your hydrangeas will flourish, rewarding you with their stunning blooms and lush foliage.
Hydrangeas thrive in well-draining, loamy soil rich in organic matter. The ideal soil composition includes:
The pH level of the soil significantly influences the colour of hydrangea blooms:
To determine your soil's pH, use a soil testing kit. Adjustments can be made by:
Regular monitoring is essential, as changes in pH can take time to reflect in bloom colour. If you're aiming for vivid blue blooms, read our expert tips in the Secrets of Blue Hydrangeas guide.
Incorporating organic matter improves soil fertility and structure:
Mix 2-4 inches of organic matter into the top 12-18 inches of soil to create an optimal growing environment.
Adequate drainage prevents root rot and other moisture-related issues:
Depending on your soil's condition, specific amendments may be necessary:
Regular soil testing helps tailor amendments to your garden's specific needs.
Thorough soil preparation lays the foundation for healthy hydrangeas and abundant blooms. By understanding and adjusting soil type, pH, organic content, and drainage, you create an environment where hydrangeas can thrive and enhance your garden's beauty.

Planting hydrangeas correctly is essential to ensure their healthy growth and the production of vibrant blooms. This guide provides a detailed, step-by-step approach to planting hydrangeas, from preparation to post-planting care.
The optimal times to plant hydrangeas are during the spring or autumn seasons. These periods offer milder temperatures and increased rainfall, which help the plants establish strong root systems before facing the extremes of summer heat or winter cold.
Hydrangeas thrive best in locations that provide morning sunlight followed by afternoon shade. This exposure protects them from the intense midday sun, reducing the risk of wilting. Additionally, ensure the chosen site has well-draining soil to prevent root rot.
Before planting, it's crucial to prepare the soil to meet the hydrangea's needs:
One of the most critical steps when planting a hydrangea, regardless of the season or weather, is to hydrate the root ball thoroughly. Fill a bucket with water and submerge the entire potted hydrangea into it. Hold the plant under the water until the soil stops bubbling, usually for 1-2 minutes. This process ensures the soil absorbs enough water, preventing the plant from drying out after planting. Proper hydration at this stage significantly increases the chances of the plant thriving.
The size and depth of the planting hole are vital for the hydrangea's establishment:
With the hole prepared and the plant hydrated, proceed with planting:
Mulching offers several benefits for newly planted hydrangeas:
After planting, proper care is essential to help the hydrangea establish itself:
Planting hydrangeas correctly ensures their successful establishment and long-term health. By following these detailed steps, including proper hydration, soil preparation, and post-planting care, you can create the ideal conditions for your hydrangeas to thrive and reward you with their stunning blooms for years to come.
When I planted my very first hydrangea - a vibrant Hydrangea macrophylla - I was so excited that I skipped a few key steps. I didn’t soak the root ball beforehand, and I underestimated how quickly the sun would dry out the soil. Within days, the leaves started to droop, and the blooms lost their colour. I remember panicking and diving into research to fix it. Since then, I always submerge the plant in water for at least a minute before planting, and I never skip mulching. That simple change made all the difference - the next year, the same plant burst into rich blue blooms and healthy new growth. It's a small habit, but now a golden rule in my planting process.
New to hydrangeas? Here are the most common beginner mistakes and how to fix them: Hydrangea planting mistakes (and fixes).
Proper watering is crucial for the health and vitality of hydrangeas. This guide explores the optimal watering techniques, frequency, and considerations to ensure your hydrangeas flourish with vibrant blooms.
Hydrangeas are known for their high water requirements, especially during their active growing season. Ensuring consistent moisture levels is key to preventing stress and promoting healthy growth.
Employing the correct watering methods can significantly impact the well-being of your hydrangeas:
Special case: Planting in a tropical or monsoon-like climate? Use this practical companion: How to Grow Hydrangeas in Tropical Humidity (airflow, fungal prevention, and watering strategy).
The frequency of watering depends on various factors, including climate, soil type, and plant maturity:
Soil type plays a significant role in determining watering needs:
Monitoring your hydrangeas for signs of over or under-watering is essential:
Adjust your watering practices accordingly if you observe these signs.
Consider the following to optimise your watering routine:
Proper watering is fundamental to the health and beauty of your hydrangeas. By understanding their water needs, employing optimal watering techniques, and monitoring soil conditions, you can ensure your hydrangeas thrive and grace your garden with their stunning blooms.
Proper fertilisation is crucial for the health and vitality of hydrangeas. This guide explores optimal fertilising techniques, timing, and considerations to ensure your hydrangeas flourish with vibrant blooms.
Hydrangeas require a balanced supply of nutrients to thrive. The primary macronutrients essential for their growth include:
Selecting an appropriate fertiliser is vital for meeting the specific needs of hydrangeas:
The timing of fertiliser application significantly impacts hydrangea health:
Proper application ensures nutrients are effectively absorbed:
The pH level of the soil influences the colour of hydrangea blooms:
Adjusting soil pH can alter bloom colour, but such changes may take time and should be approached cautiously.
Flower colour guide: Trying to get true blue blooms? Read: Secrets of Blue Hydrangeas (pH, aluminium, and what actually works).
Monitoring hydrangeas for nutrient deficiencies is essential:
Address deficiencies promptly with appropriate fertilisation to maintain plant health.
Proper fertilisation is fundamental to the health and beauty of your hydrangeas. By understanding their nutrient needs, selecting suitable fertilisers, and applying them at the right times, you can ensure your hydrangeas thrive and grace your garden with their stunning blooms.
Proper pruning is essential for maintaining the health and beauty of hydrangeas. This guide delves into the optimal timing and methods for pruning, emphasising the importance of spring pruning after the risk of frost has passed.
Pruning hydrangeas serves several vital purposes:
Contrary to some beliefs, the best time to prune hydrangeas is in the spring, after the danger of frost has passed, typically around March. Pruning in autumn is discouraged because:
By waiting until spring, any winter damage becomes evident, and pruning can be done effectively to remove affected areas.
Different hydrangea species require specific pruning methods:
To ensure effective pruning:
Pruning hydrangeas at the appropriate time and using correct techniques is crucial for their health and blooming potential. By conducting pruning in the spring after the risk of frost has passed, you allow the plant to recover from any winter damage and set the stage for a season of beautiful blooms.
Hydrangeas are cherished for their stunning blooms and lush foliage. However, they can be susceptible to various pests and diseases. This guide provides detailed information on identifying, preventing, and treating common issues to maintain the health and beauty of your hydrangeas.
Several pests can pose challenges to hydrangeas. Understanding their characteristics and control methods is essential for effective management.
Identification: Small, soft-bodied insects, often green or black, found on new growth and undersides of leaves.
Damage: They suck sap, causing distorted leaves and excrete honeydew, leading to sooty mould development.
Control:
Identification: Tiny, spider-like pests often found on the undersides of leaves, causing a stippled or speckled appearance.
Damage: Mites feed on sap, leading to leaf discolouration, drying, and eventual leaf drop.
Control:
Identification: Slime trails and chewed leaves with irregular holes are common signs.
Damage: These pests feed on young leaves and stems, particularly in damp conditions.
Control:
Hydrangeas can also suffer from a variety of diseases, often caused by fungal or bacterial pathogens.
Identification: White, powdery spots on leaves, stems, and flowers, often appearing in humid conditions.
Damage: Infected leaves may curl, yellow, and fall prematurely, weakening the plant.
Control:
Identification: Brown or purple spots on leaves, which may enlarge over time, causing leaves to yellow and drop.
Damage: Severe infections can lead to defoliation and reduced flowering.
Control:
Identification: Wilting, yellowing leaves, and blackened, mushy roots often caused by poorly draining soil.
Damage: Root rot severely limits the plant's ability to absorb water and nutrients, often leading to plant death.
Control:
Prevention is the best strategy for managing pests and diseases:
Effective pest and disease management ensures hydrangeas remain healthy and beautiful. By identifying common problems early and implementing preventive and corrective measures, you can enjoy vibrant blooms and lush foliage season after season.
In most parts of the UK, the best time is spring (once the soil is workable) or early autumn while the ground is still warm. These windows help roots establish before summer heat or winter cold. For a month-by-month checklist, use our Hydrangea Care Calendar.
Most hydrangeas prefer morning sun and afternoon shade. Too much harsh midday sun can cause wilting and scorch, while deep shade reduces flowering. If you garden in hotter regions, see how to care for hydrangeas in extreme heat.
For the first few weeks, water deeply 2–3 times per week (more in warm, dry weather), keeping the soil consistently moist but not soggy. For a practical routine and common mistakes, read Watering Hydrangeas: Best Practices.
Hydrangeas do best in rich, well-draining, moisture-retentive soil with plenty of organic matter (compost/leaf mould). If you want a deeper breakdown by texture and drainage, see the best soil for healthy hydrangeas.
Used coffee grounds can be fine in moderation as part of a compost mix, but they are not a magic “blue bloom” shortcut. Focus on compost, consistent watering, and a balanced feeding schedule. If flower colour is your goal, the key is soil pH and aluminium availability—see Secrets of Blue Hydrangeas.
The biggest bloom-boosters are: correct light, even moisture, appropriate pruning for your type, and balanced fertilising (not too much nitrogen). For practical bloom tips, see 10 tips for abundant hydrangea blooms.
Yellow leaves are often caused by overwatering (poor drainage), nutrient imbalance, or stress from heat/cold swings. Check drainage first and avoid keeping roots waterlogged. A consistent watering approach helps—see watering best practices.
Wilting is usually a mix of heat + dehydration (even if the soil is damp at the surface). Water deeply early, mulch well, and provide afternoon shade. For a step-by-step fix, read how to prevent hydrangea flowers from wilting.
In many climates, fertilise in early spring as growth starts. Some types benefit from a light follow-up in early summer, but avoid late-season feeding that pushes soft growth before winter. Use our care calendar to time feeding with the season.
A balanced, slow-release fertiliser (for example a general-purpose N-P-K) is usually safest. Too much nitrogen can mean lush leaves but fewer flowers. If you struggle with bloom quantity, see these bloom-boosting tips.
Bigleaf (Hydrangea macrophylla) generally blooms on old wood, so heavy pruning can remove flower buds. Panicle (Hydrangea paniculata) blooms on new wood and can be pruned more confidently in late winter/early spring. For a clear, type-based approach, see Spring Pruning Hydrangeas: Timing & Techniques.
Yes—many hydrangeas do well in containers if you choose the right pot size, keep moisture consistent, and feed appropriately. For variety and care guidance, see Hydrangeas in Pots: Planting and Care Guide.
Protect the root zone with mulch, shelter pots from hard frosts, and avoid late-season fertilising. For many gardeners, the most important “winter protection” is actually the right pruning timing—see spring pruning guidance so you don’t remove next season’s buds.
Powdery mildew is encouraged by high humidity + poor airflow, especially when foliage stays damp. Space plants well, water at the base, and improve ventilation. If you garden in humid conditions, see hydrangea care in tropical humidity.
Sometimes you can shift colour slightly within a season, but strong colour change usually takes time because it depends on soil pH and aluminium availability (and it mainly applies to certain types like bigleaf hydrangeas). For the most practical method, see Secrets of Blue Hydrangeas.
Hydrangeas are versatile and rewarding plants that thrive with proper care. To stay on top of seasonal tasks, refer to our Hydrangea Care Calendar for a month-by-month checklist.
A comprehensive month-by-month hydrangea care calendar to ensure your plants thrive throughout the year.
Read More
Learn how to grow and care for hydrangeas in pots on your balcony. From choosing the right varieties to planting and seasonal care, get all the tips you need for success.
Read More
A comprehensive step-by-step guide on hydrangea propagation methods, including stem cuttings, layering, division, and seed propagation, tailored to specific hydrangea species.
Read More
Richard Seres-Nagy is a passionate gardener with over 20 years of experience in hydrangea care. He founded Hydrangea Library to share expert advice, step-by-step guides, and practical tips for fellow gardening enthusiasts.
Read More