10 Spring Hydrangea Care Secrets You Need to Know (Expert Tips)
Discover the best spring hydrangea care secrets for lush, healthy blooms. Learn expert pruning, watering, fertilising, and maintenance tips to maximise growth.
Read MoreFOLLOW US:
Are your hydrangeas struggling to bloom or looking unhealthy? Many gardeners unknowingly make mistakes that prevent these beautiful shrubs from thriving. From improper pruning to incorrect watering, small errors can lead to weak growth and fewer flowers. But don’t worry—these issues are easy to fix! In this guide, we’ll reveal the 10 most common hydrangea mistakes and how you can avoid them to keep your plants lush, vibrant, and full of gorgeous blooms. Read on to ensure your hydrangeas flourish season after season!

Choosing the right location is one of the most critical factors in growing healthy and thriving hydrangeas. Many gardeners unknowingly plant their hydrangeas in unsuitable spots, leading to poor growth, weak blooms, or even plant failure. Hydrangeas require specific conditions to flourish, and placing them in the wrong environment can significantly impact their overall health.
Hydrangeas are highly sensitive to their surroundings. Factors such as sunlight exposure, soil quality, wind protection, and drainage all play a crucial role in their development. Planting in an unsuitable location can result in:
Different hydrangea varieties have varying light requirements. Choosing the right location depends on the specific type you are growing:
While hydrangeas enjoy some shade, excessive shade can result in weak stems, fewer flowers, and slower growth. If your hydrangea is not blooming well, lack of sunlight may be the issue.
Solution: If your hydrangea is struggling due to too much shade, consider transplanting it to a sunnier spot in autumn or early spring. Aim for an area that receives at least 3-4 hours of morning sun, especially for macrophylla and paniculata varieties.
Too much direct sunlight, particularly in the afternoon, can scorch leaves, cause excessive wilting, and dry out the soil too quickly. This is especially problematic in warmer regions.
Solution: Choose a location with morning sun and afternoon shade for heat-sensitive varieties like bigleaf hydrangeas. If relocation is not an option, provide shade using garden netting, taller plants, or strategic placement near a wall or fence.
Hydrangeas do not tolerate waterlogged soil. Planting in an area with poor drainage can lead to root rot, causing leaves to yellow and drop prematurely.
Solution: Ensure the planting site has well-draining soil. If your garden has heavy clay soil, improve drainage by adding organic matter like compost, leaf mould, or perlite. Raised beds or planting on a slight slope can also help excess water drain away.
Strong winds can damage delicate hydrangea stems and dry out the soil quickly, leading to stressed plants.
Solution: Choose a location with some natural wind protection, such as near a hedge, wall, or larger shrubs. If necessary, create a windbreak using bamboo screens or trellises to shield the plants.
Hydrangeas need space to grow. Crowding them too close to walls or other plants can reduce air circulation, increasing the risk of fungal diseases like powdery mildew.
Solution: Maintain adequate spacing between plants, typically 3–6 feet apart depending on the variety. This allows air to circulate freely and prevents disease buildup.
To ensure your hydrangeas thrive, follow these best practices when selecting a planting site:
Planting your hydrangeas in the right location is essential for their health and longevity. By understanding their sunlight, soil, and environmental needs, you can avoid common mistakes and enjoy lush, vibrant blooms year after year. Take the time to choose the perfect spot, and your hydrangeas will reward you with stunning flowers and vigorous growth.
Pruning is essential for maintaining healthy and attractive hydrangeas, but pruning too much or at the wrong time can lead to weak growth, fewer flowers, and even long-term damage to the plant. Many gardeners mistakenly assume that all hydrangeas require heavy pruning every year, but this is far from the truth. The key to successful pruning lies in understanding when, how, and how much to prune based on your hydrangea variety.
Hydrangeas bloom on either old wood (last season’s growth) or new wood (this season’s growth). Pruning at the wrong time can remove flower buds, resulting in a disappointing display the following year. Additionally, excessive pruning can weaken the plant, making it more susceptible to pests, diseases, and environmental stress.
To prune correctly, you must first determine whether your hydrangea blooms on old wood or new wood. Below is a guide to help identify your plant’s pruning needs:
Old-wood hydrangeas set their flower buds in late summer to early autumn. If you prune them in late autumn, winter, or early spring, you will remove these buds, leading to a flowerless season.
Solution: Only remove dead or weak stems immediately after flowering in late summer. Avoid cutting back healthy stems.
New-wood hydrangeas, like Hydrangea paniculata and Hydrangea arborescens, develop flower buds in early spring. Pruning them too early in winter may expose them to frost damage, which can weaken the plant.
Solution: Prune new-wood varieties in late winter or early spring, just before new growth begins.
Some gardeners mistakenly believe that hydrangeas should be cut back completely each year. While this might work for new-wood hydrangeas, excessive pruning of old-wood varieties can weaken the plant and disrupt its natural structure.
Solution: Only remove dead, damaged, or weak stems. For shaping purposes, never remove more than one-third of the plant at a time.
Deadheading is different from pruning. It involves removing spent flowers to encourage new blooms, improve appearance, and prevent fungal issues. Some gardeners skip deadheading, leading to a messy-looking plant.
Solution: Use sharp, clean secateurs to snip off spent blooms just above the first set of healthy leaves. Avoid cutting too far down, as this may remove future buds.
Poorly maintained pruning tools can cause ragged cuts, increasing the risk of disease. Dirty tools can also spread infections between plants.
Solution: Always use sharp, sterilised secateurs. Wipe blades with rubbing alcohol before and after use.
To keep your hydrangeas healthy and blooming year after year, follow these best practices:
Pruning hydrangeas correctly is essential for maintaining healthy, abundant blooms. By understanding whether your hydrangea blooms on old wood or new wood, pruning at the right time, and avoiding excessive cutting, you can ensure that your hydrangeas thrive year after year. Take a careful and strategic approach to pruning, and your garden will reward you with stunning floral displays each season.
The type of soil you plant your hydrangeas in has a significant impact on their health, growth, and ability to produce vibrant blooms. Many gardeners assume that hydrangeas will thrive in any soil, but using the wrong type can lead to poor flowering, weak growth, yellowing leaves, and even root rot. Understanding the specific soil requirements of hydrangeas is key to ensuring they remain healthy and productive.
Hydrangeas require well-draining, moisture-retentive, nutrient-rich soil. The wrong soil type can cause several issues, including:
To grow strong and healthy hydrangeas, the ideal soil should meet the following criteria:
Clay soil retains too much water, leading to soggy roots and poor aeration. This can cause root rot and limit oxygen availability, weakening the plant.
Solution: Improve drainage by incorporating organic matter such as compost, well-rotted manure, or coarse sand. Raised beds can also help by keeping roots above waterlogged areas.
Sandy soil drains too quickly, preventing hydrangeas from absorbing enough water and nutrients. This can lead to wilting, poor growth, and yellowing leaves.
Solution: Add organic compost, peat moss, or leaf mould to improve moisture retention and nutrient content. Applying a layer of mulch can also help retain soil moisture.
The pH of the soil affects both the colour of certain hydrangea varieties and their ability to absorb nutrients. For example, Hydrangea macrophylla (Bigleaf Hydrangea) will produce blue flowers in acidic soil (pH below 6) and pink flowers in alkaline soil (pH above 7).
Solution: Test your soil’s pH using a soil testing kit. To make the soil more acidic, add aluminium sulphate or pine needles. To increase alkalinity, incorporate garden lime.
Soil that lacks organic matter can be nutrient-poor, leading to weak growth and reduced flowering. Hydrangeas need a steady supply of nutrients to produce strong stems and lush blooms.
Solution: Enrich the soil by adding compost, well-rotted manure, or leaf mould. Apply a balanced fertiliser in spring and early summer for extra nutrients.
Poor drainage is a common issue, particularly in heavy soils. Standing water can suffocate roots and encourage fungal diseases.
Solution: Improve drainage by incorporating grit, sand, or organic matter. Ensure that planting holes are not too deep, and consider raised beds if drainage is a major concern.
Before planting hydrangeas, test your soil to determine its texture, pH level, and drainage capacity. Follow these steps:
To create the perfect growing environment for your hydrangeas, follow these best practices:
Choosing the right soil type is essential for healthy, thriving hydrangeas. By ensuring your soil is well-draining, nutrient-rich, and pH-appropriate, you can prevent common problems and enjoy beautiful blooms year after year. Take the time to test and amend your soil, and your hydrangeas will reward you with strong growth and vibrant flowers.
Watering is one of the most crucial aspects of hydrangea care, yet many gardeners struggle to get it right. Too much or too little water can lead to wilting, root rot, poor flowering, and overall weak plant health. Hydrangeas require a careful balance of moisture to thrive, and understanding the best watering techniques is essential for maintaining healthy, vibrant blooms.
Hydrangeas have shallow, fibrous root systems, making them more susceptible to drought stress and overwatering than other shrubs. The amount and frequency of watering depend on several factors, including:
While hydrangeas love moisture, excessive watering can cause root rot, fungal diseases, and yellowing leaves. Overwatered hydrangeas often appear wilted despite wet soil, as their roots struggle to take in oxygen.
Solution: Water only when the top 2–3 cm of soil feels dry. If the soil remains soggy, improve drainage by adding organic matter such as compost or planting in raised beds.
Hydrangeas are not drought-tolerant, and insufficient watering can lead to crispy, brown leaf edges, drooping stems, and reduced flowering. This is especially common in hot weather.
Solution: Provide deep, consistent watering. During hot periods, water at least twice a week. A good rule is to ensure the soil is evenly moist but not waterlogged.
Watering during the hottest part of the day leads to rapid evaporation, while watering in the evening increases the risk of fungal diseases due to prolonged moisture on leaves.
Solution: Water early in the morning so plants can absorb moisture before the heat of the day.
Sprinkling water over the foliage rather than the soil can promote fungal infections such as powdery mildew and leaf spot. Hydrangeas absorb water primarily through their roots, not their leaves.
Solution: Use a soaker hose or watering can to direct water to the base of the plant, keeping leaves dry.
Water high in chlorine or lime can disrupt soil pH and affect nutrient absorption, leading to chlorosis (yellowing leaves) and reduced flower production.
Solution: If possible, use rainwater or allow tap water to sit for 24 hours before use to let chemicals dissipate.
Follow these best practices to ensure your hydrangeas receive the right amount of water:
The exact amount of water needed depends on climate and soil conditions, but as a general guideline:
Recognising the signs of improper watering can help you adjust your routine before serious damage occurs:
Proper watering is essential for healthy, flourishing hydrangeas. By avoiding common watering mistakes and following best practices, you can ensure your plants receive the right balance of moisture for strong growth and stunning blooms. Pay attention to your plant’s specific needs, adjust watering frequency based on weather conditions, and always prioritise deep, consistent watering to keep your hydrangeas thriving.
Fertilising is essential for healthy, vigorous hydrangeas, but applying the wrong type of fertiliser, using too much, or feeding at the wrong time can do more harm than good. Many gardeners unknowingly make mistakes that lead to weak growth, excessive foliage, poor flowering, or even nutrient imbalances. Understanding how and when to fertilise hydrangeas correctly will ensure lush, long-lasting blooms and strong, healthy plants.
Hydrangeas require a balanced supply of nutrients to support root development, stem strength, leaf health, and abundant flowering. Improper fertilisation can result in:
Over-fertilising can cause hydrangeas to produce an abundance of leaves at the expense of flowers. High nitrogen levels stimulate vegetative growth, leading to large, leafy plants with few or no blooms.
Solution: Use a balanced, slow-release fertiliser (such as 10-10-10 or 12-4-8) and apply it according to the recommended dosage on the package. Avoid excessive feeding, particularly in late summer, as this can promote weak growth that is vulnerable to frost damage.
Applying fertiliser too early in the season can stimulate growth before the plant is ready, while late-season feeding can result in tender new shoots that are damaged by frost.
Solution: Fertilise hydrangeas in early spring and again in early summer, but stop feeding by mid-to-late summer to allow the plant to harden off before winter.
Different hydrangea varieties have slightly different nutrient needs. Using a high-nitrogen fertiliser on flowering hydrangeas can limit bloom production.
Solution: Choose a phosphorus-rich fertiliser (such as 10-20-10) if your hydrangeas struggle to bloom. If your plants appear weak, a balanced fertiliser with potassium (such as 10-10-10) can help strengthen stems.
Soil pH plays a critical role in nutrient availability. For instance, an incorrect pH can lock essential nutrients in the soil, making them inaccessible to the plant.
Solution: Conduct a soil test before fertilising. If the pH is too high or too low, adjust it with garden lime (to raise pH) or sulphur (to lower pH).
Relying solely on chemical fertilisers without adding organic matter can deplete the soil of beneficial microbes and lead to nutrient imbalances.
Solution: Incorporate compost, well-rotted manure, or organic mulch into the soil to improve fertility and microbial activity.
Follow these best practices to ensure your hydrangeas receive the right nutrients:
Different hydrangeas have unique fertilising requirements. Below is a guide to help you choose the best approach for your variety:
If your hydrangeas are struggling, they may be experiencing fertiliser-related issues. Look for these symptoms:
Fertilising hydrangeas correctly is key to ensuring strong growth and spectacular blooms. By using the right type of fertiliser, applying it at the correct time, and balancing nutrients with organic matter, you can avoid common mistakes and keep your hydrangeas thriving. Always test your soil first, follow recommended feeding guidelines, and remember that more fertiliser is not always better—sometimes, less is more when it comes to hydrangea care.
Soil pH plays a crucial role in hydrangea health, yet many gardeners overlook it. The pH level of the soil affects nutrient availability and, in some hydrangea varieties, even determines flower colour. Ignoring soil pH can lead to poor flowering, weak growth, nutrient deficiencies, and unbalanced soil conditions. Understanding and maintaining the right soil pH is essential for ensuring healthy, vibrant hydrangeas.
The pH scale measures how acidic or alkaline the soil is, ranging from 0 (highly acidic) to 14 (highly alkaline). Hydrangeas generally thrive in slightly acidic to neutral soil (pH 5.5–7.0), but certain varieties, particularly Hydrangea macrophylla (Bigleaf Hydrangea), exhibit colour changes based on pH:
Beyond flower colour, incorrect pH levels can limit nutrient absorption, leading to deficiencies in essential minerals such as iron, magnesium, and phosphorus.
Many gardeners assume their soil is suitable for hydrangeas without testing it. However, soil conditions vary greatly, even within the same garden. Ignoring soil pH can lead to plants struggling to absorb nutrients.
Solution: Use a soil pH test kit or send a sample to a laboratory for accurate results. Test the soil annually, preferably in early spring.
In alkaline soil (pH above 7.0), hydrangeas may develop yellowing leaves (chlorosis) due to iron deficiency, and Bigleaf Hydrangeas will struggle to produce blue flowers.
Solution: Lower soil pH by applying elemental sulphur, pine needles, or peat moss. Use aluminium sulphate if you specifically want to turn pink hydrangeas blue.
Extremely acidic soil (pH below 5.5) can hinder root function and reduce phosphorus availability, which is essential for flowering.
Solution: Raise soil pH by adding garden lime or wood ash. Apply these amendments in autumn to allow time for the pH to adjust before the growing season.
Some fertilisers can alter soil pH over time. For instance, high-nitrogen fertilisers may increase acidity, while certain balanced fertilisers contribute to alkalinity.
Solution: Choose a pH-neutral, balanced fertiliser (such as 10-10-10) if your soil pH is already optimal.
Soil pH naturally fluctuates over time, particularly in poor-quality soil lacking organic matter.
Solution: Regularly add compost, well-rotted manure, or organic mulch to stabilise soil pH and improve nutrient availability.
Once you have tested your soil, you may need to adjust the pH to create the best growing conditions for your hydrangeas.
To encourage blue flowers and improve acidic soil conditions:
To encourage pink flowers or correct excessive acidity:
To maintain optimal soil pH levels, follow these best practices:
Recognising when soil pH is out of balance can help prevent long-term problems. Look for these warning signs:
Maintaining the correct soil pH is crucial for healthy, thriving hydrangeas. Whether you want to enhance flower colour or ensure optimal nutrient absorption, regular pH testing and soil amendments will help keep your hydrangeas strong and vibrant. By paying attention to pH levels and adjusting as needed, you can enjoy stunning blooms and lush growth season after season.
One of the most common mistakes gardeners make with hydrangeas is planting them in the wrong amount of sunlight. Sun exposure plays a crucial role in determining flowering, leaf health, and overall plant vigour. Too much direct sun can cause leaf scorch and dehydration, while too much shade can reduce blooming and lead to weak, leggy growth. Understanding the specific sun requirements for different hydrangea varieties is essential for ensuring healthy growth and abundant flowers.
Hydrangeas need the right balance of sun and shade to flourish. Sun exposure influences:
Each hydrangea variety has unique sun exposure needs. Choosing the right location based on the type of hydrangea you are growing will significantly impact its health and flowering potential.
While some hydrangeas tolerate shade, too little sunlight can result in poor flowering, weak stems, and slow growth. If your hydrangea is producing lots of leaves but very few flowers, lack of sunlight may be the problem.
Solution: If your hydrangea is struggling in deep shade, consider transplanting it to a sunnier spot in early spring or autumn. Most hydrangeas thrive in locations with at least 3–4 hours of morning sunlight.
Some hydrangea varieties, such as Hydrangea macrophylla, are sensitive to strong afternoon sunlight. Too much direct sun, especially in hot climates, can lead to scorched leaves, excessive wilting, and dry soil.
Solution: If your hydrangea receives too much afternoon sun, plant it in a location that offers morning sun with afternoon shade. If moving the plant is not an option, provide shade using taller plants, a garden screen, or shade cloth during peak summer months.
Hydrangeas planted too close to walls or fences may receive uneven sunlight, leading to lopsided growth where one side is weak and underdeveloped.
Solution: Ensure your hydrangeas are positioned so that all sides receive adequate light. If necessary, trim back surrounding plants or relocate your hydrangea to a more open space.
Sunlight needs vary based on climate. In cooler regions, hydrangeas benefit from more sun exposure, while in hot climates, they need more shade to prevent stress.
Solution: Adjust planting locations based on your local climate. In hot areas, prioritise partial shade, while in cooler regions, hydrangeas can tolerate full sun.
To ensure your hydrangeas receive the right amount of sunlight, follow these best practices:
If your hydrangeas are not performing well, sunlight may be the problem. Look for these signs:
Providing the right balance of sunlight and shade is crucial for healthy, thriving hydrangeas. By understanding the sunlight needs of your specific hydrangea variety and adjusting planting locations accordingly, you can ensure strong growth, vibrant flowers, and lush foliage. Take the time to assess your garden’s light conditions, and your hydrangeas will reward you with spectacular blooms season after season.
One of the most overlooked mistakes in hydrangea care is planting them too close together. While it may be tempting to create a dense, lush display, insufficient spacing can lead to poor air circulation, increased risk of disease, competition for nutrients, and uneven growth. Giving hydrangeas enough room to grow allows them to develop into strong, healthy plants with abundant flowers.
Hydrangeas need space to expand their roots, develop a sturdy framework, and receive adequate light and airflow. Planting them too closely together can result in:
Each hydrangea variety has different growth habits, so spacing requirements vary. Below are general guidelines for proper spacing:
When hydrangeas are planted too closely, they struggle to develop properly. Over time, they may become stunted, with fewer blooms and increased disease susceptibility.
Solution: If your hydrangeas are too crowded, consider transplanting them in early spring or autumn when temperatures are cooler. Make sure to follow the recommended spacing guidelines for your specific variety.
Dense planting reduces airflow, which can trap moisture and create the perfect conditions for fungal infections such as powdery mildew.
Solution: Prune excess foliage to improve ventilation and prevent disease outbreaks. If necessary, move plants further apart to promote better air circulation.
Newly planted hydrangeas may look small, but they will expand significantly over the years. Planting them too close initially can cause overcrowding as they mature.
Solution: Check the expected mature size of your hydrangea variety before planting. Space them accordingly to avoid the need for transplanting later.
Placing hydrangeas against walls or fences without sufficient space can restrict airflow, increase humidity, and cause plants to grow lopsided.
Solution: Keep hydrangeas at least 2–3 feet (60–90 cm) away from walls or structures to allow proper growth and ventilation.
Follow these best practices to ensure your hydrangeas have enough room to grow:
If you suspect your hydrangeas are too crowded, look for these warning signs:
Proper spacing is essential for healthy, thriving hydrangeas. By giving your plants enough room to grow, you will promote better air circulation, stronger stems, and more abundant blooms. Whether you are planting new hydrangeas or adjusting existing ones, ensuring adequate spacing will help prevent disease, improve flowering, and create a beautiful, well-balanced garden.
Many gardeners underestimate the impact of harsh winter conditions on hydrangeas, assuming they will survive without extra care. However, neglecting winter protection can lead to damaged flower buds, weakened stems, frostbite, and even plant death. Certain hydrangea varieties, particularly those that bloom on old wood, are highly sensitive to cold weather and require proper protection to ensure healthy growth and flowering the following season.
Hydrangeas, especially those in colder climates, are vulnerable to freezing temperatures, frost heaving, drying winds, and fluctuating weather conditions. Without proper protection, winter damage can cause:
Not all hydrangeas require extensive winter care, but some are more sensitive than others. Here is an overview of the most common varieties and their winter protection needs:
Many gardeners forget to mulch their hydrangeas, leaving the roots exposed to freezing temperatures.
Solution: Apply a 10–15 cm (4–6 inch) layer of organic mulch (such as bark, straw, or dry leaves) around the base of the plant in late autumn. This insulates the roots and helps retain soil moisture.
Hydrangeas that bloom on old wood set their buds in late summer. If left unprotected, these buds can be killed by frost, preventing flowering the next season.
Solution: In late autumn, cover sensitive hydrangeas with a breathable burlap wrap, frost cloth, or chicken wire filled with dry leaves. Avoid using plastic covers, as they trap moisture and cause rot.
Some gardeners mistakenly prune hydrangeas in autumn, which removes the buds needed for next year's flowers.
Solution: Avoid pruning old-wood hydrangeas after late summer. If pruning is necessary, wait until spring when new growth emerges.
Cold winter winds can dry out stems and buds, leading to winter kill.
Solution: Plant hydrangeas in a sheltered location, such as near a fence or building, to block strong winds. If this is not possible, create a windbreak using burlap or garden fabric.
Even after winter has passed, a sudden late frost can damage newly emerging buds.
Solution: If a frost is expected in early spring, cover hydrangeas overnight with horticultural fleece or an old bedsheet to protect tender new growth.
To ensure your hydrangeas survive the winter and bloom the following year, follow these steps:
If your hydrangeas show any of these symptoms in spring, they may have suffered from winter damage:
Providing proper winter protection is crucial for ensuring that hydrangeas survive cold temperatures and bloom the following season. By applying mulch, shielding plants from harsh winds, and covering sensitive varieties, you can prevent winter damage and keep your hydrangeas healthy. With a little preparation, your plants will reward you with strong growth and beautiful flowers year after year.
Hydrangeas are relatively hardy plants, but they are still susceptible to a range of pests and diseases that can weaken them, reduce flowering, and even lead to plant decline if left untreated. Many gardeners fail to monitor their hydrangeas for early signs of trouble, which can allow minor issues to escalate into serious infestations or infections. Regular inspection and preventative care are key to keeping hydrangeas healthy, strong, and vibrant.
Pests and diseases can negatively impact hydrangeas in several ways, including:
Aphids are small, soft-bodied insects that cluster on new growth, feeding on plant sap and causing distorted leaves and weakened stems. They also excrete a sticky substance called honeydew, which encourages the growth of sooty mould.
Solution: Spray affected areas with a strong stream of water to dislodge aphids. For severe infestations, apply an organic insecticidal soap or neem oil. Encouraging natural predators like ladybirds can also help keep aphid populations under control.
Slugs and snails are notorious for chewing large holes in hydrangea leaves, particularly on young plants.
Solution: Use beer traps, crushed eggshells, or copper tape to deter slugs and snails. Alternatively, apply organic slug pellets sparingly.
These tiny pests thrive in dry, hot conditions and cause yellow stippling on leaves, which may eventually drop.
Solution: Increase humidity around plants by misting leaves regularly. If infestations persist, apply an organic miticide or neem oil.
Adult vine weevils chew irregular notches in leaves, while larvae feed on roots, potentially killing young plants.
Solution: Inspect leaves for signs of damage and manually remove adult weevils at night. For root infestations, apply nematodes (biological control) to target weevil larvae in the soil.
Powdery mildew appears as a white, powdery coating on leaves, particularly in humid conditions with poor air circulation.
Solution: Improve airflow by pruning overcrowded stems. Avoid watering leaves, and apply a fungicidal spray if necessary.
Leaf spot diseases cause small brown or purple spots on leaves, which may eventually turn yellow and drop.
Solution: Remove and dispose of infected leaves to prevent spread. Avoid overhead watering and apply an appropriate fungicide if the infection worsens.
This fungal disease affects hydrangea flowers, causing them to develop grey mould and decay, particularly in cool, damp conditions.
Solution: Improve air circulation and remove infected flowers. Use a copper-based fungicide if necessary.
Excessive moisture and poor drainage can lead to root rot, which causes yellowing leaves, wilting, and eventual plant death.
Solution: Ensure well-draining soil and avoid overwatering. If root rot is detected, remove affected plants and amend soil with organic matter to improve drainage.
Preventative care is the best way to keep hydrangeas pest- and disease-free. Follow these essential steps:
If you notice any of these symptoms, take action promptly:
Regular monitoring and proactive care are essential to keeping hydrangeas healthy and thriving. By addressing pest and disease issues early, you can prevent serious damage and ensure strong, beautiful blooms year after year. Through proper watering, pruning, and natural pest control methods, your hydrangeas will remain lush, vibrant, and free from common threats.
By avoiding these common mistakes, you can ensure your hydrangeas thrive and produce stunning blooms year after year. Paying attention to proper planting, watering, fertilising, and seasonal care will keep your garden full of healthy, vibrant hydrangeas.
Discover the best spring hydrangea care secrets for lush, healthy blooms. Learn expert pruning, watering, fertilising, and maintenance tips to maximise growth.
Read More
Discover 10 essential tips for ensuring abundant blooms in hydrangeas, including site selection, pruning, fertilisation, and pest protection.
Read More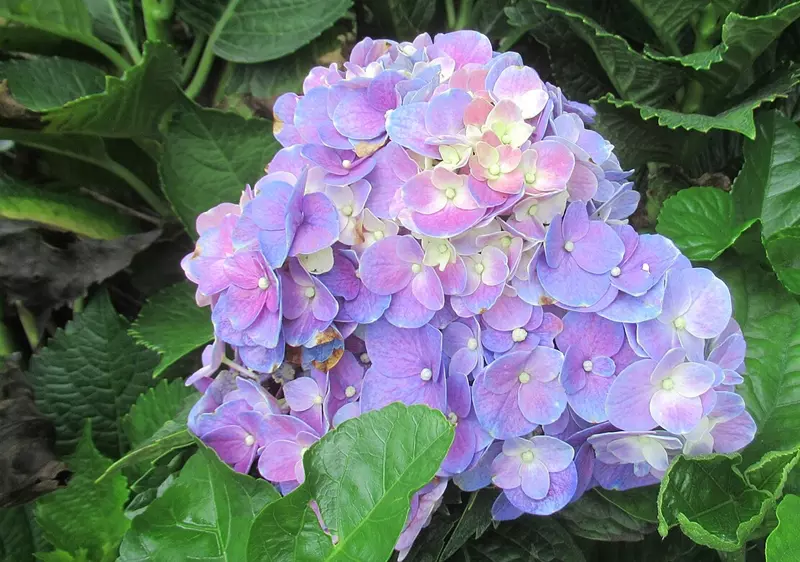
Discover proven tips and techniques to help your hydrangeas bloom again. From pruning to watering, this guide ensures a thriving garden.
Read More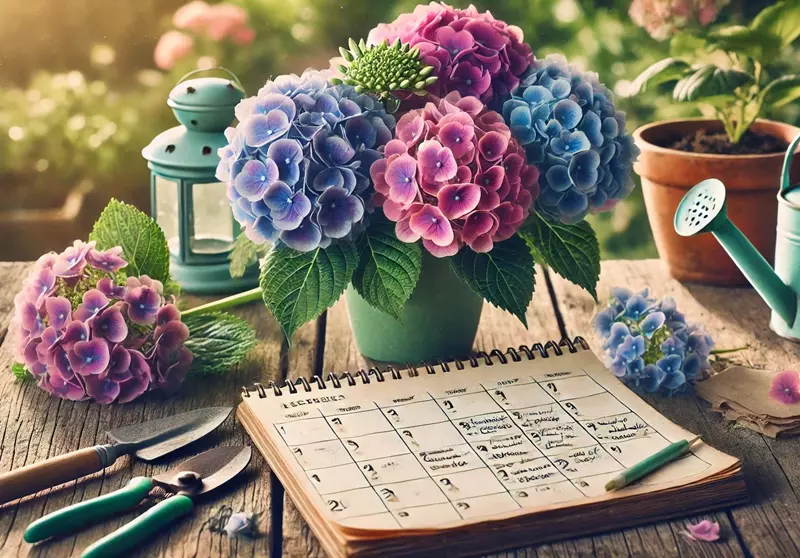
A comprehensive month-by-month hydrangea care calendar to ensure your plants thrive throughout the year.
Read More
Explore natural and eco-friendly methods to protect hydrangeas from pests and diseases. Learn bee-safe strategies to maintain healthy plants.
Read More
Learn how to propagate Hydrangea macrophylla with our quick guide. Discover step-by-step methods for softwood, semi-ripe, and hardwood cuttings to grow healthy plants.
Read More
Richard Seres-Nagy is a passionate gardener with over 20 years of experience in hydrangea care. He founded Hydrangea Library to share expert advice, step-by-step guides, and practical tips for fellow gardening enthusiasts.
Read More