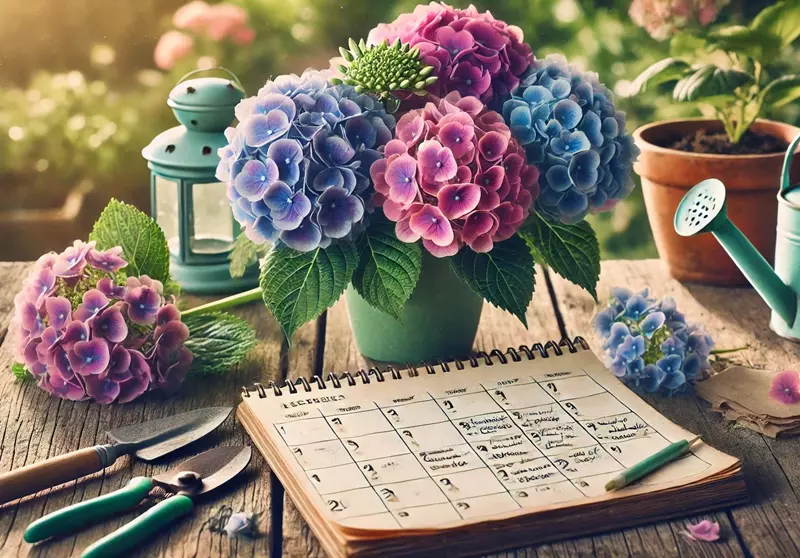
Table of Contents
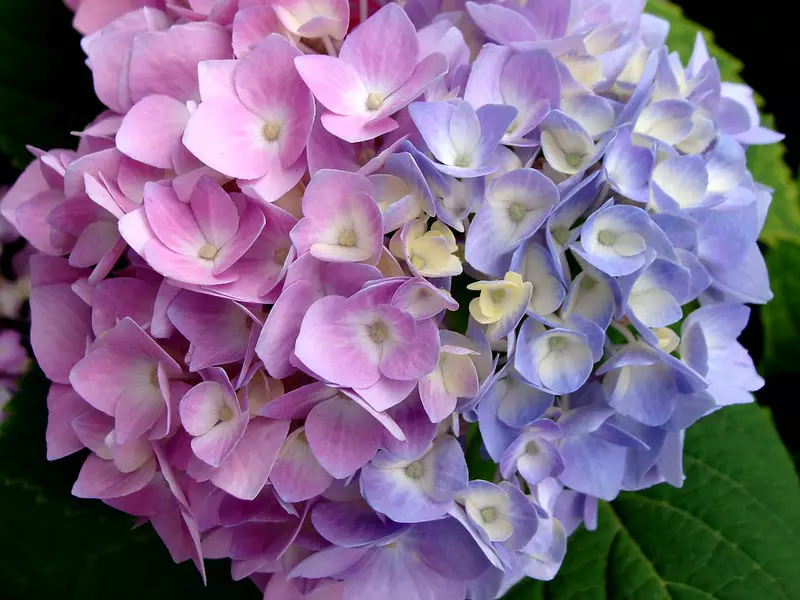
Hydrangeas are a beloved addition to many gardens, offering lush foliage and vibrant blooms. Proper spring care is essential to ensure these plants thrive throughout the growing season. Below are ten expert tips to help you maintain healthy and beautiful hydrangeas.
 Source: pxhere.com; License: CC0 1.0
1. Prune at the Right Time
Pruning hydrangeas at the appropriate time is crucial for ensuring abundant blooms and maintaining plant health. The timing and method of pruning depend largely on the specific type of hydrangea in your garden. Understanding these nuances will help you avoid common pitfalls and promote vigorous flowering.
Understanding Hydrangea Bloom Cycles
Hydrangeas are generally classified based on their blooming habits:
- Old Wood Bloomers: These hydrangeas develop flower buds on the previous year's growth. Pruning them too late can remove these buds, resulting in fewer blooms.
- New Wood Bloomers: These varieties form buds on the current year's growth. They can be pruned in late winter or early spring without affecting their blooming potential.
Pruning Guidelines for Different Hydrangea Types
It's essential to identify your hydrangea species to determine the correct pruning time:
- Mophead and Lacecap Hydrangeas (Hydrangea macrophylla): These popular varieties bloom on old wood. The Royal Horticultural Society recommends pruning them immediately after flowering, typically in late summer. Remove spent flowers and thin out overcrowded stems to improve air circulation and encourage healthy growth. Avoid pruning in late winter or early spring, as this can remove developing buds and reduce flowering.
- Panicle Hydrangeas (Hydrangea paniculata): Blooming on new wood, these hydrangeas should be pruned in late winter or early spring before new growth emerges. According to Gardening Know How, cutting back up to one-third of the plant encourages strong stems and prolific blooming. This timing allows the plant to develop robust new growth that will support the season's flowers.
- Smooth Hydrangeas (Hydrangea arborescens): Also blooming on new wood, these can be pruned in early spring. The Royal Horticultural Society suggests cutting them back to a framework of branches close to the ground to promote vigorous growth and large blooms.
- Oakleaf Hydrangeas (Hydrangea quercifolia): These bloom on old wood and should be pruned immediately after flowering, typically in midsummer. As noted by Gardening Know How, pruning later can remove buds set for the next year's blooms. Focus on removing spent flowers and any dead or damaged wood to maintain shape and health.
- Climbing Hydrangeas (Hydrangea anomala subsp. petiolaris): These also bloom on old wood. Prune them after flowering, removing spent blooms and trimming back to maintain the desired size and shape. Avoid heavy pruning, as it can reduce flowering in the following season.
General Pruning Tips
Regardless of the type, consider these general tips when pruning hydrangeas:
- Use Sharp, Clean Tools: Ensure your pruning shears are sharp and sterilised to make clean cuts and prevent disease transmission.
- Remove Dead or Damaged Wood: At any time of year, you can remove dead, diseased, or damaged stems to improve plant health.
- Avoid Over-Pruning: Excessive pruning can lead to reduced flowering and weakened plants. Always prune with the specific needs of your hydrangea type in mind.
By pruning your hydrangeas at the right time and following these guidelines, you'll promote healthier plants and enjoy more abundant and beautiful blooms throughout the growing season.
For additional expert advice on hydrangea care, visit our in-depth Spring Pruning Hydrangeas Guide.
2. Test and Amend Soil
Importance of Soil Testing
Before planting hydrangeas or making any soil amendments, it's crucial to conduct a soil test. This analysis provides valuable information about the soil's pH level, nutrient content, and overall health. Understanding these factors allows you to make informed decisions to create an optimal growing environment for your hydrangeas.
Soil testing can be performed using DIY kits available at garden centres, or by sending samples to local agricultural extension services. Regular testing, every 3 to 5 years, is recommended to monitor soil health and make necessary adjustments. Gardening Know How advises that new gardens should be tested before planting so any necessary amendments can be worked into the soil. Gardening Know How also suggests that soil should be tested every 3-5 years in established gardens. Gardening Know How further recommends that if your acidic plants aren't thriving, take a soil test before you attempt to adjust the pH level. Gardening Know How notes that there are a few ways you can make your soil more acidic, from adding special fertilizer and elemental amendments, to simply mixing in acid-rich compost.
Understanding Soil pH and Hydrangea Colour
The pH level of your soil significantly influences the colour of certain hydrangea varieties, particularly Hydrangea macrophylla (mophead and lacecap types). In acidic soils (pH below 5.5), these hydrangeas tend to produce blue flowers, while in neutral to alkaline soils (pH above 6.5), the blooms are more likely to be pink. This colour change is due to the availability of aluminium ions in the soil, which hydrangeas absorb more readily in acidic conditions.
By adjusting the soil pH, gardeners can influence bloom colour. To encourage blue flowers, you can lower the soil pH by incorporating acidic amendments such as sulphur or peat moss. Conversely, to promote pink blooms, raising the soil pH by adding lime can be effective. Regular soil testing is essential to monitor pH levels and ensure they are adjusted appropriately. For a comprehensive guide on this topic, refer to our article on the best soil for growing healthy hydrangeas.
Amending Soil for Optimal Hydrangea Growth
Once you've tested your soil and determined its composition and pH, you can make targeted amendments to create the ideal environment for your hydrangeas:
- Adjusting pH: To lower soil pH (increase acidity), incorporate elemental sulphur or aluminium sulphate. To raise pH (reduce acidity), add garden lime. Always follow product instructions and re-test soil to monitor changes.
- Enhancing Nutrient Content: Enrich the soil with organic matter such as compost or well-rotted manure to improve fertility, structure, and moisture retention.
- Improving Drainage: Hydrangeas prefer well-draining soil. If your soil is heavy clay, consider adding coarse sand or organic matter to enhance drainage and prevent root rot.
Incorporating diatomaceous earth into your soil can also offer benefits. This natural substance improves soil aeration and moisture retention, promoting healthier root systems. For detailed information on its advantages and application methods, see our article on diatomaceous earth for hydrangeas.
Ongoing Soil Maintenance
Maintaining optimal soil conditions is an ongoing process. Regularly monitor your hydrangeas for signs of nutrient deficiencies or pH imbalances, such as chlorosis (yellowing leaves) or unexpected changes in bloom colour. Mulching annually with organic materials can help conserve moisture, regulate soil temperature, and gradually improve soil structure and fertility as it decomposes.
By diligently testing and amending your soil, you provide your hydrangeas with a strong foundation to flourish, resulting in stunning displays year after year.
3. Water Consistently
Understanding Hydrangea Water Requirements
Hydrangeas thrive in moist, well-drained soil. They are not drought-tolerant and can suffer quickly from water stress. Generally, hydrangeas require about 1 inch (2.5 cm) of water per week, either from rainfall or supplemental irrigation. However, this can vary based on factors such as species, soil type, and climate. Consistent moisture is key, but it's essential to avoid waterlogged conditions, as hydrangeas do not like their roots sitting in water, which can lead to root rot.
Best Practices for Watering Hydrangeas
- Deep Watering: Water deeply to encourage roots to grow down into the soil, enhancing drought resistance. This involves applying water slowly, allowing it to penetrate the soil thoroughly.
- Morning Watering: Watering in the early morning reduces evaporation and allows plants to absorb moisture before the day's heat. This practice helps prevent wilting during hot afternoons.
- Mulching: Apply a 2–3 inch (5–7.5 cm) layer of organic mulch around the base of the plant. Mulch helps retain soil moisture, regulates soil temperature, and suppresses weed growth.
- Avoid Overhead Watering: Water at the base of the plant to keep foliage dry, reducing the risk of fungal diseases. Using soaker hoses or drip irrigation systems can be effective methods.
Adjusting Watering Practices Based on Conditions
Several factors influence how much and how often you should water your hydrangeas:
- Soil Type: Sandy soils drain quickly and may require more frequent watering, while clay soils retain moisture longer but can become compacted. Amending soil with compost can improve its moisture-retention capacity while ensuring excess water drains away.
- Climate and Weather: In hot or dry conditions, hydrangeas may need watering more than once a week. Conversely, in cooler, humid climates, less frequent watering might suffice.
- Plant Maturity: Newly planted hydrangeas require more frequent watering to establish roots, often needing water several times a week. Established plants with deeper root systems can tolerate longer intervals between watering.
Recognising Signs of Water Stress
Monitoring your hydrangeas for signs of water stress is essential:
- Underwatering: Wilting leaves and flowers, dry soil, and browning leaf edges indicate insufficient moisture.
- Overwatering: Yellowing leaves, consistently wet soil, and root rot symptoms suggest excessive moisture.
Adjust your watering practices promptly if you observe these signs to maintain plant health.
By adhering to consistent and appropriate watering practices, you can ensure your hydrangeas remain healthy and vibrant, rewarding you with their stunning floral displays throughout the growing season.
4. Apply Mulch
Mulching is a fundamental practice in hydrangea care, offering numerous benefits that contribute to the plant's overall health and aesthetic appeal. By applying a suitable mulch layer, gardeners can improve soil conditions, conserve moisture, regulate temperature, and suppress weed growth, all of which are essential for thriving hydrangeas.
Benefits of Mulching Hydrangeas
Mulching provides several advantages that directly impact the well-being of hydrangeas:
- Moisture Retention: A mulch layer helps retain soil moisture by reducing evaporation, ensuring that hydrangeas have consistent access to the water they need, especially during dry periods.
- Temperature Regulation: Mulch acts as an insulating layer, keeping soil temperatures stable. This protection is crucial during temperature fluctuations, safeguarding hydrangea roots from extreme heat and cold.
- Weed Suppression: By covering the soil, mulch inhibits weed germination and growth, reducing competition for nutrients and water.
- Soil Improvement: Organic mulches decompose over time, enriching the soil with organic matter, enhancing soil structure, fertility, and microbial activity.
- Protection from Soil Erosion: Mulch minimizes the impact of rainfall on the soil surface, preventing erosion and nutrient runoff.
Choosing the Right Mulch for Hydrangeas
Selecting an appropriate mulch is vital for maximizing benefits:
- Organic Mulches: Materials such as pine bark, compost, shredded leaves, and pine needles are excellent choices. They decompose naturally, adding nutrients to the soil. Pine needles, in particular, can slightly acidify the soil, which is beneficial for hydrangeas that prefer acidic conditions.
- Inorganic Mulches: Options like gravel or landscape fabric are less common for hydrangeas but can be used in specific situations where organic mulches are not suitable. However, they do not improve soil fertility.
Proper Application of Mulch
To effectively mulch hydrangeas:
- Timing: Apply mulch in mid to late spring, as leaf buds begin to open. This timing helps conserve soil moisture and suppress early weed growth.
- Depth: Spread a 2–3 inch (5–7.5 cm) layer of mulch evenly around the base of the plant, extending to the drip line. In dry, sandy soils, a thicker layer up to 5 inches (12.5 cm) may be beneficial.
- Placement: Keep mulch a few inches away from the stems or trunk to prevent rot and pest issues.
- Maintenance: Replenish mulch annually or as needed to maintain the desired depth, especially after decomposition or displacement.
Considerations for Different Climates
Mulching practices may vary based on regional climates:
- Temperate Climates: In areas with mild winters and moderate summers, standard mulching practices suffice, focusing on moisture retention and weed suppression.
- Hot Climates: In warmer regions, mulching is crucial for keeping the soil cool and conserving moisture. Applying mulch in spring helps increase soil tilth, retain heat, and reduce spring weeds.
- Cold Climates: In regions with harsh winters, applying mulch in late autumn provides insulation against freezing temperatures, protecting hydrangea roots from frost damage.
Potential Challenges and Solutions
While mulching offers numerous benefits, be mindful of potential issues:
- Excessive Mulching: Applying too thick a layer can lead to waterlogging and root rot. Stick to recommended depths to ensure proper soil aeration.
- Pest Attraction: Certain mulches may attract pests. Choosing the right type and keeping mulch away from plant stems can mitigate this risk.
- Soil pH Impact: Some organic mulches can alter soil pH over time. Regular soil testing helps monitor and adjust pH levels as needed.
By thoughtfully applying mulch, gardeners can significantly enhance the health and beauty of their hydrangeas, ensuring these beloved plants flourish throughout the growing season.
5. Fertilise Appropriately
Proper fertilisation is essential for hydrangeas to achieve their full potential, resulting in lush foliage and abundant blooms. Understanding the specific nutrient requirements and applying the right fertilisers at appropriate times can significantly enhance the health and beauty of these beloved plants.
Understanding Hydrangea Nutrient Needs
Hydrangeas benefit from a balanced supply of primary nutrients:
- Nitrogen (N): Promotes healthy leaf and stem growth.
- Phosphorus (P): Encourages robust root development and flowering.
- Potassium (K): Enhances overall plant health and disease resistance.
A balanced fertiliser with an equal ratio of these nutrients, such as a 10-10-10 formulation, is generally suitable for hydrangeas.
Choosing the Right Fertiliser
Selecting an appropriate fertiliser depends on your hydrangea's specific needs and soil conditions:
- Organic Slow-Release Fertilisers: Products like compost or well-rotted manure provide a steady nutrient supply and improve soil structure.
- Specialised Hydrangea Fertilisers: Formulations tailored for hydrangeas may include additional micronutrients to support optimal growth and flowering.
It's advisable to avoid high-nitrogen fertilisers, as they can promote excessive leaf growth at the expense of blooms.
Timing and Application
Proper timing of fertiliser application is crucial:
- Early Spring: Apply fertiliser as new growth emerges to support the upcoming growing season.
- Mid-Summer: A second application can be beneficial, particularly for varieties that bloom on new wood.
Always follow the manufacturer's instructions regarding application rates to prevent over-fertilisation, which can harm the plant.
Soil pH and Bloom Colour
The pH level of your soil can influence the colour of certain hydrangea species' blooms:
- Acidic Soil (pH below 6): Tends to produce blue flowers.
- Alkaline Soil (pH above 7): Leads to pink or red flowers.
Adjusting soil pH can help achieve the desired bloom colour. For blue blooms, soil acidifiers like aluminium sulphate can be used, while adding lime can encourage pink hues.
Monitoring Plant Health
Regularly observe your hydrangeas for signs of nutrient deficiencies or excesses:
- Yellowing Leaves: May indicate nitrogen deficiency.
- Poor Bloom Production: Could result from insufficient phosphorus.
- Leaf Burn: Often a sign of over-fertilisation.
Adjust your fertilisation practices accordingly to maintain optimal plant health.
By fertilising appropriately, you provide your hydrangeas with the essential nutrients they need to flourish, resulting in vibrant foliage and stunning floral displays throughout the growing season.
6. Manage Sunlight Exposure
Proper management of sunlight exposure is crucial for hydrangeas to flourish. Understanding the specific light requirements of different hydrangea species ensures optimal growth and vibrant blooms.
Understanding Hydrangea Light Preferences
Hydrangeas exhibit varying light preferences based on their species:
- Bigleaf Hydrangea (Hydrangea macrophylla): Prefers morning sun and afternoon shade. Excessive direct sunlight can lead to wilting and leaf scorch.
- Oakleaf Hydrangea (Hydrangea quercifolia): Thrives in partial shade, with too much sun potentially hindering blooming.
- Panicle Hydrangea (Hydrangea paniculata): Tolerates more sun, requiring five to six hours of sunlight daily. However, in hot climates, morning sun and afternoon shade are ideal.
If you're looking for sun-tolerant hydrangea varieties, there are excellent options that can withstand brighter conditions while still producing spectacular blooms.
Assessing Your Garden's Sunlight
To determine the best planting location:
- Monitor Sun Patterns: Observe the amount and intensity of sunlight in different areas of your garden throughout the day.
- Identify Microclimates: Look for spots that offer natural shade during the hottest parts of the day, such as areas shaded by trees or structures.
Strategies for Managing Sunlight Exposure
Implementing the following strategies can help protect hydrangeas from excessive sun:
- Strategic Planting: Place hydrangeas in locations that receive morning sunlight and are shielded from intense afternoon sun.
- Use of Mulch: Applying mulch helps retain soil moisture and regulate soil temperature, mitigating the effects of heat.
- Provision of Artificial Shade: In particularly hot climates, consider using shade cloths during peak sunlight hours to protect the plants.
Considerations for Hot Climates
In regions with intense heat:
- Regular Watering: Ensure consistent moisture levels to prevent stress and wilting.
- Soil Preparation: Amend soil with organic matter to improve water retention and provide essential nutrients.
- Protective Measures: Utilise shade during peak heat periods to shield hydrangeas from sunburn.
If you’re growing hydrangeas in particularly hot environments, you might find our guide on how to care for hydrangeas in hot climates useful.
By carefully managing sunlight exposure and selecting appropriate hydrangea varieties, you can cultivate healthy plants that enhance your garden with their beauty.
7. Monitor for Pests and Diseases
Hydrangeas are stunning garden plants, but like any other plant, they can fall victim to various pests and diseases. Early detection and proper management are key to keeping your hydrangeas healthy and ensuring they thrive throughout the growing season.
Common Hydrangea Pests and How to Identify Them
Several pests can damage hydrangeas, affecting their foliage, flowers, and overall growth. Regularly inspecting your plants will help catch infestations early before they cause significant harm.
- Aphids: These tiny, soft-bodied insects cluster on the undersides of leaves and stems, sucking sap and causing leaves to curl and yellow. They also excrete honeydew, which can lead to sooty mould.
- Spider Mites: Extremely small but damaging, these mites thrive in hot, dry conditions. Their presence is often indicated by fine webbing on leaves and yellowing or stippling of foliage.
- Slugs and Snails: These pests feed on young hydrangea leaves and flowers, leaving irregular holes and silvery slime trails.
- Scale Insects: Hard-shelled, immobile insects that attach themselves to stems and leaves, feeding on plant sap and weakening the plant.
For natural and chemical-free solutions to manage these pests, take a look at our guide on natural methods for controlling hydrangea pests and diseases.
Common Hydrangea Diseases and Prevention Tips
Hydrangeas can also be affected by various fungal and bacterial diseases, which can impact growth and flowering. Proper plant care and hygiene can help prevent many of these problems.
- Powdery Mildew: This fungal disease appears as a white, powdery coating on leaves and stems, stunting growth and causing leaf distortion. It thrives in humid conditions with poor air circulation.
- Leaf Spot: Caused by fungi such as Cercospora and Alternaria, this disease results in brown or purple spots on leaves, which can merge and cause premature leaf drop.
- Botrytis Blight: A grey, fuzzy fungal growth affecting flowers and leaves, often developing in cool, damp conditions.
- Root Rot: Excess moisture and poor drainage can cause fungal pathogens to attack the roots, leading to wilting and plant decline.
To understand how to prevent and treat these common hydrangea diseases, explore our detailed guide on common hydrangea diseases and treatment options.
Best Practices for Preventing Pests and Diseases
By following good gardening practices, you can reduce the likelihood of pest infestations and disease outbreaks:
- Proper Spacing: Ensure adequate airflow around hydrangeas by planting them with enough space between each plant.
- Regular Pruning: Remove dead or diseased plant material to prevent the spread of infections.
- Well-Draining Soil: Avoid overly wet conditions that can promote fungal growth and root rot.
- Watering at the Base: Water hydrangeas at the soil level rather than overhead to prevent excess moisture on foliage, which encourages fungal diseases.
- Mulching: Apply organic mulch to suppress weeds and regulate soil moisture, but keep it a few inches away from stems to prevent rot.
If you notice any issues with your hydrangeas, our comprehensive guide on common hydrangea problems and solutions can help you identify and address them effectively.
By regularly monitoring for pests and diseases and taking preventative action, you can keep your hydrangeas strong and healthy, ensuring they continue to bloom beautifully season after season.
8. Transplant if Necessary
Transplanting hydrangeas can be essential for their health and optimal growth. Whether they're outgrowing their current space, receiving inadequate sunlight, or facing unsuitable soil conditions, relocating them can rejuvenate these beloved shrubs.
When to Transplant Hydrangeas
The ideal times to transplant hydrangeas are during their dormant periods:
- Autumn: After the plant has shed its leaves and before the ground freezes. This allows roots to establish before winter.
- Early Spring: Just before new growth begins, ensuring the plant can acclimate before the growing season.
Transplanting during these times minimizes stress and promotes successful establishment in the new location.
Preparing for Transplantation
Proper preparation is crucial for a successful transplant:
- Select the New Site: Choose a location with partial shade and well-draining soil. Hydrangeas thrive in areas with morning sun and afternoon shade.
- Prepare the Plant: Water the hydrangea thoroughly a day before the move to hydrate the roots and reduce transplant shock.
- Dig the New Hole: Create a hole twice as wide and as deep as the root ball to accommodate root expansion.
Steps to Transplant a Hydrangea
- Prune if Necessary: Trim back the hydrangea to make handling easier and reduce water loss through transpiration.
- Dig Around the Plant: Carefully dig around the hydrangea, maintaining a distance to preserve the root ball.
- Lift the Plant: Gently lift the hydrangea, keeping the root ball intact to prevent root damage.
- Transfer to New Location: Place the hydrangea in the prepared hole, ensuring it's planted at the same depth as before.
- Backfill and Water: Fill the hole with soil, firming it gently around the roots, and water thoroughly to settle the soil.
Post-Transplant Care
After transplanting, proper care ensures the hydrangea establishes well:
- Mulching: Apply a layer of mulch around the base to retain moisture and regulate soil temperature, keeping it away from the stem to prevent rot.
- Regular Watering: Maintain consistent soil moisture, especially during dry periods, to support root establishment.
- Avoid Fertilising Immediately: Allow the plant to acclimate before applying fertiliser to prevent root burn.
For a detailed step-by-step guide on transplanting hydrangeas, visit our comprehensive resource: How to Transplant a Hydrangea: A Step-by-Step Guide.
By following these guidelines, you can successfully transplant your hydrangea, ensuring it continues to thrive and enhance your garden's beauty.
9. Provide Support for Heavy Blooms
Understanding the Need for Support
Several factors contribute to the drooping of hydrangea blooms:
- Bloom Size: Varieties like 'Annabelle' produce exceptionally large flower heads that can weigh down stems.
- Stem Strength: Rapid growth or insufficient sunlight can result in weaker stems unable to support heavy blooms.
- Environmental Conditions: Rain and wind add extra weight and stress to the blooms, increasing the likelihood of drooping.
Providing support helps maintain the plant's structure, prevents damage, and enhances its overall appearance.
Methods to Support Hydrangea Blooms
Various techniques can be employed to support heavy hydrangea blooms:
- Plant Supports: Installing peony rings or grid supports early in the growing season allows the plant to grow through them, providing discreet support to the stems.
- Staking: Individual stakes can be used to support specific stems. Tie the stems gently to the stakes using soft garden ties to avoid damage.
- Natural Supports: Surrounding hydrangeas with sturdy companion plants or low hedges can offer natural support. For instance, planting box hedging around 'Annabelle' hydrangeas provides a natural brace for the heavy blooms.
For more detailed tips on ensuring abundant hydrangea blooms, you can refer to our guide: 10 Tips for Ensuring Abundant Hydrangea Blooms.
Pruning Practices to Enhance Support
Proper pruning can strengthen hydrangea stems, reducing the need for additional support:
- Timing: Prune hydrangeas at the appropriate time based on their variety to encourage sturdy growth.
- Techniques: Thinning out weaker stems and cutting back old wood can promote the development of stronger, more resilient stems capable of supporting heavy blooms.
For guidance on making hydrangeas bloom again through effective pruning, visit: How to Make Hydrangeas Bloom Again.
Soil and Nutrient Management
Ensuring your hydrangeas have the proper soil conditions and nutrients can also play a role in supporting heavy blooms:
- Soil Composition: Well-draining soil enriched with organic matter promotes healthy root development, providing a stable foundation for the plant.
- Nutrient Balance: Avoid excessive nitrogen fertilisation, which can lead to lush foliage but weaker stems. A balanced fertiliser supports overall plant health and sturdier growth.
Understanding the secrets of soil preparation and care can further enhance your hydrangea's performance: Secrets of Blue Hydrangeas: Soil Preparation and Care.
By implementing these support strategies and maintaining proper care practices, you can ensure that your hydrangeas remain upright and continue to be a stunning focal point in your garden throughout the blooming season.
10. Adjust Bloom Colour
Understanding the Science Behind Bloom Colour
The colour of hydrangea blooms, particularly in Hydrangea macrophylla varieties, is influenced by soil pH and the availability of aluminium:
- Acidic Soils (pH below 6.0): Enable hydrangeas to absorb aluminium, resulting in blue or purple flowers.
- Alkaline Soils (pH above 7.0): Limit aluminium uptake, leading to pink or red blooms.
Steps to Change Hydrangea Bloom Colour
To alter the colour of your hydrangea blooms, follow these steps:
- Test Your Soil pH: Use a soil testing kit to determine the current pH level. This will guide your amendments.
- For Blue Blooms:
- Lower the soil pH by applying soil acidifiers such as aluminium sulfate or sulphur.
- Incorporate organic materials like pine needles or composted oak leaves to naturally acidify the soil.
- For Pink Blooms:
- Raise the soil pH by adding garden lime (calcium carbonate) to reduce soil acidity.
- Avoid using fertilisers containing aluminium, as they promote blue hues.
- Monitor and Maintain: Regularly check soil pH and adjust as needed, keeping in mind that changes can take several months to manifest in bloom colour.
Considerations and Limitations
While many hydrangeas respond to soil pH adjustments, some factors can limit colour change:
- Hydrangea Species: Not all species exhibit colour variability; for example, white-flowered hydrangeas typically do not change colour with soil pH alterations.
- Soil Composition: Highly buffered soils may resist pH changes, making it challenging to adjust bloom colour.
- Environmental Factors: Climate and weather conditions can influence the effectiveness of soil amendments.
Understanding these limitations is crucial for setting realistic expectations when attempting to change hydrangea bloom colours.
By carefully managing soil pH and nutrient availability, gardeners can enjoy a spectrum of hydrangea bloom colours, enhancing the visual appeal of their landscapes.
By following these spring hydrangea care secrets, you’ll set your plants up for a season of healthy growth and stunning blooms. Whether it’s proper pruning, maintaining soil quality, or ensuring adequate hydration, each step plays a crucial role in hydrangea care.
For more expert tips on growing hydrangeas, explore our in-depth guides at Hydrangea Library. Happy gardening!
About the Author

Richard Seres-Nagy is a passionate gardener with over 20 years of experience in hydrangea care. He founded Hydrangea Library to share expert advice, step-by-step guides, and practical tips for fellow gardening enthusiasts.
Read More