Table of Contents
Methods of Propagating Hydrangea Macrophylla
Hydrangea macrophylla, commonly known as bigleaf hydrangea, is one of the most popular flowering shrubs, prized for its large, vibrant blooms. If you want to expand your hydrangea collection or share plants with friends, propagation is an effective and rewarding method. This guide explores the best techniques for propagating Hydrangea macrophylla with detailed explanations and step-by-step instructions.
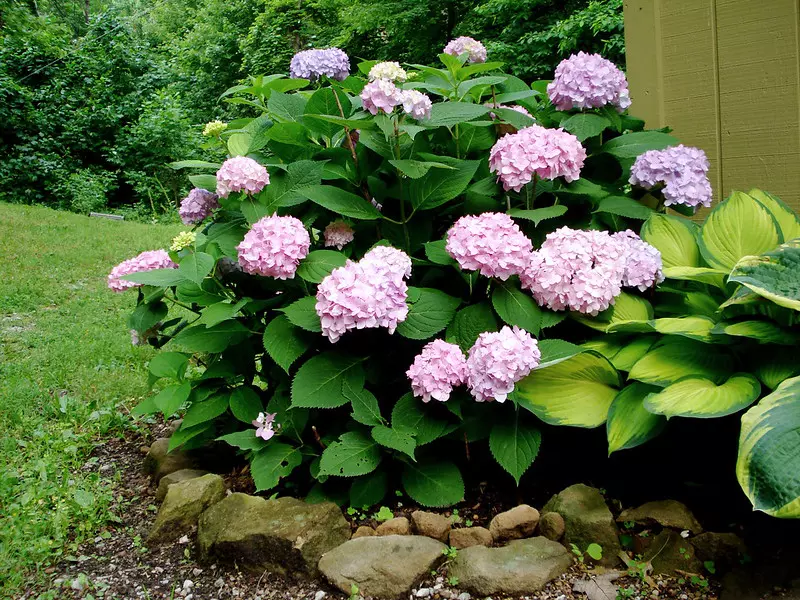
 Propagation cuttings of Hydrangea macrophylla. - Source: hydrangealibrary.com; Author: AI
1. Propagation by Softwood Cuttings
Softwood cuttings are the most common and successful method for propagating Hydrangea macrophylla. This technique is typically carried out in late spring to early summer when new growth is still tender and flexible.
Steps to Propagate Using Softwood Cuttings:
- Select a Healthy Stem: Choose a non-flowering stem with at least three leaf nodes. The cutting should be around 4–6 inches (10–15 cm) long.
- Make the Cut: Using sharp, sterilised secateurs, cut just below a leaf node at a 45-degree angle.
- Remove Excess Leaves: Strip the lower leaves, leaving only the top pair to reduce moisture loss.
- Apply Rooting Hormone: Dip the cut end in a rooting hormone powder or gel to encourage faster root development.
- Plant the Cutting: Insert the cutting into a pot filled with well-draining compost mixed with perlite.
- Maintain Humidity: Cover the pot with a plastic bag or place it in a propagator to retain moisture.
- Wait for Roots to Develop: Keep the cutting in indirect light and ensure the soil remains moist. Roots typically develop within 3–4 weeks.
- Transplanting: Once roots are strong, transfer the new plant to a larger pot or garden bed.
Tip: Avoid placing the cuttings in direct sunlight, as excessive heat can cause wilting.
2. Propagation by Hardwood Cuttings
Hardwood cuttings are taken in late autumn or winter when the plant is dormant. This method takes longer but is ideal for producing strong, resilient plants.
Steps to Propagate Using Hardwood Cuttings:
- Choose a Mature Stem: Select a woody stem from the current year’s growth that has turned brown.
- Cut the Stem: Cut a 6–8 inch (15–20 cm) section, ensuring it has at least three nodes.
- Prepare the Cutting: Remove leaves and any soft tips to prevent decay.
- Apply Rooting Hormone: Dip the base in rooting powder to promote root growth.
- Plant the Cutting: Insert it into a trench outdoors or a deep pot with well-draining soil.
- Protect Over Winter: Cover the cuttings with mulch or place them in a cold frame.
- Wait for Root Development: Roots will form by spring, and cuttings can be transplanted the following season.
Tip: Patience is key with hardwood cuttings, as they take longer to establish but produce robust plants.
3. Propagation by Layering
Layering is a reliable method that allows the stem to develop roots while still attached to the parent plant. This technique is best done in early spring or autumn.
Steps to Propagate Using Layering:
- Select a Low-Growing Stem: Choose a flexible branch that can be bent to the ground.
- Prepare the Stem: Make a small incision on the underside of the stem to encourage rooting.
- Bury the Stem: Secure the wounded section into the soil and hold it down with a stone or U-shaped pin.
- Keep Moist: Water regularly and ensure the soil remains damp.
- Wait for Root Growth: After a few months, roots should form at the buried section.
- Sever and Transplant: Once roots are well-developed, cut the new plant from the parent and transplant it.
Tip: Layering is a low-maintenance method ideal for gardeners who prefer a hands-off approach.
4. Propagation by Division
Division is suitable for mature, multi-stemmed hydrangeas. This method is best done in early spring before new growth begins.
Steps to Propagate Using Division:
- Dig Up the Plant: Carefully lift the hydrangea from the ground, preserving as much root structure as possible.
- Separate the Sections: Gently pull apart or cut the plant into smaller sections, ensuring each has roots attached.
- Replant Immediately: Place the divided plants in new locations with well-prepared soil.
- Water Thoroughly: Keep the soil consistently moist to help the divisions establish.
Tip: This method is only suitable for older plants with multiple stems.
Whether using cuttings, layering, or division, propagating Hydrangea macrophylla is a cost-effective way to expand your garden. Softwood cuttings offer the quickest results, while hardwood cuttings and layering require patience but yield strong plants. Experiment with different methods to find what works best for your gardening style.
By following these expert propagation techniques, you can successfully grow new hydrangeas and enjoy their stunning blooms for years to come.
Optimal Timing for Propagation of Hydrangea Macrophylla
Why Timing Matters in Hydrangea Macrophylla Propagation
The timing of propagation directly impacts the success rate and the health of the new plants. Propagating at the right time ensures that cuttings or divisions have the best chance to establish strong root systems before facing environmental stressors like extreme temperatures or drought.
Key considerations for timing include:
- Stage of plant growth
- Ambient temperature and humidity
- Root development period
- Seasonal weather patterns
Best Seasons for Propagation
Different propagation methods require varying optimal times. Below is a detailed breakdown of the best seasons to propagate Hydrangea macrophylla for each method.
1. Softwood Cuttings – Late Spring to Early Summer
Optimal period: Late May to early July
Softwood cuttings are most successful when taken during late spring to early summer. During this phase, new growth is still tender but mature enough to root quickly.
- Temperature: Daytime temperatures between 18°C and 24°C are ideal.
- Why this time is ideal: High humidity and active plant growth promote quick root development.
- Avoid: Taking cuttings during extreme heat or drought conditions.
2. Hardwood Cuttings – Late Autumn to Early Winter
Optimal period: November to January
Hardwood cuttings should be taken after the plant enters dormancy, typically in late autumn through early winter.
- Temperature: Cooler conditions (5°C to 10°C) encourage gradual rooting.
- Why this time is ideal: The plant’s energy is concentrated in the roots, aiding root development.
- Avoid: Taking cuttings too early in autumn, when stems are not fully mature.
3. Layering – Early Spring or Autumn
Optimal periods: March to April (spring) and September to October (autumn)
Layering works best when temperatures are moderate and soil moisture levels are high.
- Spring layering: Encourages rapid growth as the plant enters its active phase.
- Autumn layering: Allows roots to develop slowly over winter.
- Avoid: Layering during peak summer or mid-winter frost conditions.
4. Division – Early Spring
Optimal period: Late February to March
Dividing mature hydrangeas is best done just before new growth begins in early spring.
- Temperature: Mild conditions (10°C to 15°C) support quick recovery.
- Why this time is ideal: Plants establish roots before the active growing season.
- Avoid: Dividing during summer or late autumn, which can stress the plant.
Factors Influencing Timing
While seasonal guidelines are helpful, local climate conditions and microclimates can shift the ideal propagation windows.
Consider the following factors:
- Frost Dates: In colder regions, delay propagation until the risk of frost has passed.
- Humidity Levels: Higher humidity accelerates rooting, especially for softwood cuttings.
- Soil Temperature: Root development improves in soil temperatures above 15°C.
- Rainfall Patterns: Consistent moisture without waterlogging promotes healthy roots.
Tips for Successful Timing
- Monitor Weather Forecasts: Avoid propagation before prolonged cold snaps or heatwaves.
- Check Plant Health: Only propagate from vigorous, disease-free plants.
- Use Proper Tools: Clean and sharpen tools to prevent infection and improve cut quality.
- Adjust for Indoor Propagation: If propagating indoors, you can extend the window beyond typical outdoor timings.
Choosing the right time for propagating Hydrangea macrophylla is crucial for success. Softwood cuttings thrive in late spring, hardwood cuttings root best in the dormant months, while layering and division have their optimal windows in early spring and autumn. By aligning your propagation efforts with these timings and local conditions, you can ensure healthier, faster-growing hydrangeas.
Plan wisely, monitor conditions, and enjoy the rewards of a flourishing hydrangea collection.
Why the Right Materials Matter
Using proper materials significantly increases the success rate of propagation. Quality tools help ensure clean cuts, while suitable growing mediums and containers provide the optimal environment for root development. Investing in the correct supplies reduces plant stress and promotes healthier growth.
Essential Tools for Propagation
Having the right tools is crucial for efficient and effective propagation of Hydrangea macrophylla. Below are the key items you will need:
1. Pruning Shears or Secateurs
Purpose: To take clean cuttings without damaging the plant.
- Use sharp, sterilised secateurs to make precise cuts.
- Regularly clean tools with rubbing alcohol to prevent disease transmission.
2. Sharp Knife
Purpose: Ideal for making small incisions during layering or refining cuttings.
- Choose a clean, sharp blade to avoid crushing plant tissues.
3. Cutting Board or Hard Surface
Purpose: Provides a stable surface for preparing cuttings.
Materials for Root Development
Once cuttings are taken, creating the right rooting environment is vital. The following materials help promote strong root growth:
1. Rooting Hormone
Purpose: Stimulates faster and more reliable root formation.
- Available as powder, gel, or liquid.
- Enhances rooting success, especially for hardwood cuttings.
2. Growing Medium
Purpose: Provides support and moisture for developing roots.
- Recommended mixes: A combination of peat-free compost, perlite, and coarse sand.
- Ensure the medium is well-draining to prevent rot.
3. Containers and Pots
Purpose: Holds cuttings or divisions during root formation.
- Use small pots (7–10 cm) for individual cuttings.
- Ensure containers have drainage holes to avoid waterlogging.
4. Propagation Tray with Dome
Purpose: Maintains consistent humidity levels for softwood cuttings.
- Clear domes allow light in while retaining moisture.
- Helps prevent cuttings from drying out.
Additional Materials for Environmental Control
Controlling temperature and humidity is crucial, especially for indoor propagation.
1. Heat Mat (Optional)
Purpose: Provides consistent bottom heat to encourage faster root growth.
- Ideal for propagation in cooler climates.
- Maintains soil temperatures between 18°C and 24°C.
2. Spray Bottle
Purpose: Keeps cuttings moist without overwatering.
- Use a fine mist to avoid disturbing the growing medium.
3. Plastic Bags (Alternative to Propagation Domes)
Purpose: Creates a mini-greenhouse effect around individual pots.
- Secure the bag with a rubber band around the pot’s rim.
- Ensure the bag does not touch the cutting’s leaves.
Materials for Plant Care Post-Propagation
Once roots are established, having the right materials for transplantation and care is essential.
1. Larger Pots for Transplanting
Purpose: Accommodates developing roots as plants grow.
- Use pots with a diameter of at least 15 cm for young plants.
2. Fertiliser
Purpose: Provides essential nutrients post-propagation.
- Choose a balanced, slow-release fertiliser to support growth.
- Avoid over-fertilising newly rooted cuttings.
3. Mulch (For Outdoor Planting)
Purpose: Helps retain soil moisture and regulate temperature.
- Apply a 5–7 cm layer around the base, avoiding direct contact with stems.
Optional Materials for Advanced Propagation
For gardeners looking to enhance their propagation success, consider these additional tools:
- pH Meter: Ensures the soil maintains an optimal pH between 5.5 and 6.5.
- Label Markers: Keeps track of different cuttings and propagation dates.
- Sterilising Solution: For regular cleaning of tools and containers.
Having the right materials is the foundation of successful Hydrangea macrophylla propagation. From cutting tools and rooting mediums to environmental control equipment, each item plays a vital role in the propagation process. By preparing all necessary supplies in advance, you increase your chances of cultivating strong, healthy hydrangeas that will flourish in your garden for years to come.
Step-by-Step Propagation Process for Hydrangea Macrophylla
Why Follow a Step-by-Step Process?
Propagation involves several stages, each crucial to the plant’s development. Following a structured process ensures the cuttings, divisions, or layers have the best chance of establishing strong roots. Skipping steps or rushing can lead to failed propagation and weakened plants.
Step 1: Select the Appropriate Propagation Method
Choosing the right method depends on the time of year and the maturity of the plant. The most common methods for propagating Hydrangea macrophylla are:
- Softwood Cuttings: Best in late spring to early summer.
- Hardwood Cuttings: Ideal in late autumn to early winter.
- Layering: Suitable in early spring or autumn.
- Division: Effective for mature plants in early spring.
Tip: Softwood cuttings are recommended for beginners due to their faster rooting time.
Step 2: Gather Your Materials
Before starting, prepare all necessary tools and materials to streamline the process. Essential items include:
- Sharp pruning shears or secateurs
- Rooting hormone (optional but recommended)
- Well-draining growing medium (e.g., peat-free compost with perlite)
- Small pots with drainage holes
- Propagation tray or plastic bags for humidity control
- Spray bottle for misting
- Labels to identify cuttings
Step 3: Take the Cutting or Prepare the Plant
For Softwood and Hardwood Cuttings:
- Select a Healthy Stem: Choose a disease-free, vigorous stem. For softwood cuttings, select flexible, non-flowering shoots. For hardwood cuttings, opt for mature, woody stems.
- Make the Cut: Cut a 10–15 cm section just below a leaf node using sterilised secateurs.
- Remove Lower Leaves: Strip off the bottom leaves, leaving the top pair intact to reduce moisture loss.
- Apply Rooting Hormone: Dip the cut end into rooting hormone to encourage faster root development.
For Layering:
- Select a Low-Growing Stem: Choose a flexible branch that can be bent to the ground.
- Wound the Stem: Make a small incision on the underside to stimulate rooting.
- Bury the Stem: Secure it into the soil with a U-shaped pin or stone, leaving the tip exposed.
For Division:
- Lift the Parent Plant: Carefully dig up a mature hydrangea in early spring.
- Divide the Root Ball: Using a sharp spade or knife, split the plant into sections, ensuring each has roots and stems.
- Replant Immediately: Place each division into prepared soil and water thoroughly.
Step 4: Plant the Cuttings or Prepared Sections
For Cuttings:
- Prepare Pots: Fill small pots with the chosen growing medium.
- Insert the Cutting: Place the cutting into the soil, burying at least one node.
- Firm the Soil: Gently press the soil around the cutting for stability.
For Layering:
Ensure the buried section of the stem remains moist throughout the rooting period.
For Division:
Water newly planted divisions regularly to help establish roots.
Step 5: Create the Right Environment
Maintaining appropriate humidity and temperature is crucial for successful rooting.
- Humidity: Cover pots with a plastic bag or place them in a propagation tray with a lid.
- Temperature: Keep the environment between 18°C and 24°C for optimal root development.
- Light: Provide bright, indirect light. Avoid direct sunlight, which can scorch cuttings.
- Moisture: Mist regularly to prevent dehydration but avoid waterlogging.
Step 6: Monitor and Maintain
Regular care during the rooting period is essential.
- Check Moisture Levels: Keep the growing medium moist but not soggy.
- Watch for Root Development: Softwood cuttings usually root in 3–4 weeks, while hardwood cuttings may take several months.
- Inspect for Pests or Diseases: Remove any affected cuttings promptly.
Step 7: Transplant Rooted Cuttings
- Test Root Strength: Gently tug the cutting; resistance indicates root formation.
- Prepare Larger Pots or Garden Beds: Use nutrient-rich, well-draining soil.
- Transplant Carefully: Minimise root disturbance during planting.
- Water Thoroughly: Provide consistent moisture during the early establishment phase.
By following this step-by-step propagation process, you can successfully grow new Hydrangea macrophylla plants that will flourish in your garden. Patience, proper care, and attention to detail are key to achieving strong, healthy hydrangeas. With practice, propagation becomes a rewarding way to expand your plant collection and share your love of gardening.
Caring for New Cuttings of Hydrangea Macrophylla
Why Proper Care for New Cuttings Is Crucial
The period immediately following propagation is critical. New cuttings are vulnerable and require specific conditions to develop roots and transition into self-sufficient plants. Without proper care, cuttings may wilt, rot, or fail to establish.
Key factors for successful care include:
- Maintaining optimal humidity and temperature
- Ensuring appropriate light exposure
- Providing adequate moisture without overwatering
- Protecting against pests and diseases
- Transitioning to outdoor conditions through hardening off
Step 1: Create the Ideal Environment
New cuttings require a stable environment that mimics greenhouse conditions. High humidity and consistent warmth are essential for encouraging root development.
Humidity Control
- Use a Propagation Dome: Covering cuttings with a clear plastic dome or bag traps moisture, maintaining humidity levels above 80%.
- Mist Regularly: Lightly mist cuttings with a spray bottle to prevent dehydration. Avoid excessive moisture that can cause rot.
Temperature Requirements
- Optimal Range: Keep temperatures between 18°C and 24°C.
- Use a Heat Mat (Optional): In cooler climates, a heat mat provides consistent warmth to promote faster root growth.
Step 2: Provide Appropriate Light Conditions
Light is vital for photosynthesis, but new cuttings are sensitive to direct sunlight.
- Bright, Indirect Light: Place cuttings in a location with filtered light or partial shade.
- Avoid Harsh Sunlight: Direct exposure can cause leaf scorch and stress the cutting.
- Indoor Propagation: A north-facing windowsill or use of grow lights set to low intensity works well.
Step 3: Maintain Proper Moisture Levels
Moisture management is crucial. Both underwatering and overwatering can harm developing roots.
- Check Soil Moisture Daily: The growing medium should remain damp but not waterlogged.
- Water Carefully: Use a watering can with a fine rose or a spray bottle to avoid displacing the cutting.
- Ensure Drainage: Always use pots with drainage holes to prevent root rot.
Step 4: Monitor for Pests and Diseases
Young cuttings are more susceptible to pests and fungal infections. Early detection and prevention are key.
- Common Pests: Watch for aphids, spider mites, and fungus gnats.
- Disease Prevention: Avoid overcrowding and maintain good air circulation.
- Treatment Options: Use organic insecticidal soap for pests and a mild fungicide if fungal issues arise.
Step 5: Observe Root Development
Rooting times vary depending on the propagation method and environmental conditions.
- Softwood Cuttings: Typically develop roots within 3–4 weeks.
- Hardwood Cuttings: May take several months to root fully.
- Testing Root Growth: Gently tug on the cutting; resistance indicates root formation.
Step 6: Transplanting Rooted Cuttings
Once roots are established, it's time to move the cuttings to larger pots or garden beds.
- Prepare the New Pot: Use fresh, nutrient-rich soil with good drainage.
- Handle with Care: Minimise root disturbance during transplanting.
- Water Thoroughly: Ensure the soil is moist to help the plant adjust to its new environment.
Step 7: Harden Off the Cuttings
Before planting outdoors, harden off the cuttings to acclimate them to external conditions.
- Gradual Exposure: Start by placing the cuttings outside for a few hours each day, gradually increasing exposure over 7–10 days.
- Avoid Harsh Conditions: Protect from strong winds, heavy rain, and direct midday sun during the hardening-off period.
Tips for Successful Care
- Label Your Cuttings: Keep track of propagation dates and methods used.
- Patience Is Key: Some cuttings take longer to root; avoid disturbing them unnecessarily.
- Regular Inspections: Consistent monitoring ensures early detection of issues.
- Use Balanced Fertiliser: Once established, a diluted fertiliser can encourage stronger growth.
Caring for new Hydrangea macrophylla cuttings requires attention to detail and patience. By maintaining the right environment, managing moisture and light conditions, and gradually transitioning plants to outdoor settings, you’ll maximise your chances of cultivating strong, thriving hydrangeas. With proper care, these new cuttings will reward you with vibrant blooms and healthy growth for years to come.
Frequently Asked Questions (FAQ)
Can I propagate Hydrangea macrophylla in water?
While some plants root well in water, hydrangea cuttings develop stronger root systems when propagated in soil or compost. This method provides essential nutrients and support for the developing roots.
Is rooting hormone necessary for successful propagation?
Rooting hormone is not essential but can enhance and speed up the rooting process, especially for semi-ripe and hardwood cuttings.
How long does it take for hydrangea cuttings to root?
Softwood cuttings typically root within 4-6 weeks under optimal conditions. Semi-ripe and hardwood cuttings may take longer, often up to 8-10 weeks.
What is the best time of year to transplant rooted cuttings?
Once your cuttings have established a strong root system, the best time to transplant them is in early autumn or spring when temperatures are moderate and the risk of frost is minimal.
Can I propagate hydrangeas from old wood?
Hydrangea macrophylla is best propagated from new, non-flowering shoots. Old wood can be used for hardwood cuttings, but success rates may be lower compared to softwood cuttings.
How should I care for newly planted cuttings outdoors?
Ensure the new plants are placed in partial shade with well-draining soil. Water regularly, especially during dry spells, and mulch around the base to retain moisture and suppress weeds.
What are common mistakes to avoid when propagating hydrangeas?
- Overwatering: Can cause cuttings to rot. Always ensure proper drainage.
- Using unhealthy parent plants: Only use disease-free and pest-free stems for propagation.
- Placing cuttings in direct sunlight: Bright, indirect light is best to avoid scorching young plants.
- Skipping humidity: Cuttings require a humid environment to root successfully; use a propagator or plastic covering.
Propagating Hydrangea macrophylla is a rewarding process that allows you to grow vibrant, healthy plants for your garden or to share with friends. By following the proper techniques and providing the right conditions, you can successfully cultivate beautiful hydrangeas with ease. Always be patient—root development takes time, but the results are well worth the effort!

The Ultimate Guide to Hydrangea macrophylla (Garden Hydrangea)
A complete guide to Hydrangea macrophylla, including planting, pruning, soil adjustments, eco-friendly pest management, propagation, and garden design ideas.
Read More
Hydrangea Propagation Methods: Step-by-Step Guide
A comprehensive step-by-step guide on hydrangea propagation methods, including stem cuttings, layering, division, and seed propagation, tailored to specific hydrangea species.
Read More
Optimal Soil for Thriving Hydrangeas: A Comprehensive Guide
Discover the best soil for growing healthy hydrangeas. Learn how to create optimal soil conditions and maintain them for vibrant blooms.
Read More
About the Author

Richard Seres-Nagy is a passionate gardener with over 20 years of experience in hydrangea care. He founded Hydrangea Library to share expert advice, step-by-step guides, and practical tips for fellow gardening enthusiasts.
Read More