Table of Contents
Hydrangeas are among the most beloved garden plants, admired for their vibrant blooms, lush foliage, and versatility. However, achieving the healthiest plants with the most stunning flowers requires more than just planting and watering. Many gardeners unknowingly make small mistakes that can impact the overall health and appearance of their hydrangeas.
Whether you are a beginner or an experienced gardener, mastering a few key techniques can make all the difference. In this guide, we will explore five essential hydrangea care hacks that will help you grow stronger, more resilient plants with bigger and more beautiful blooms. From adjusting soil pH to selecting the best pruning methods, these simple yet powerful tricks will ensure that your hydrangeas thrive season after season.
Ready to transform your hydrangeas? Let’s dive into these expert tips and give your garden the care it deserves!
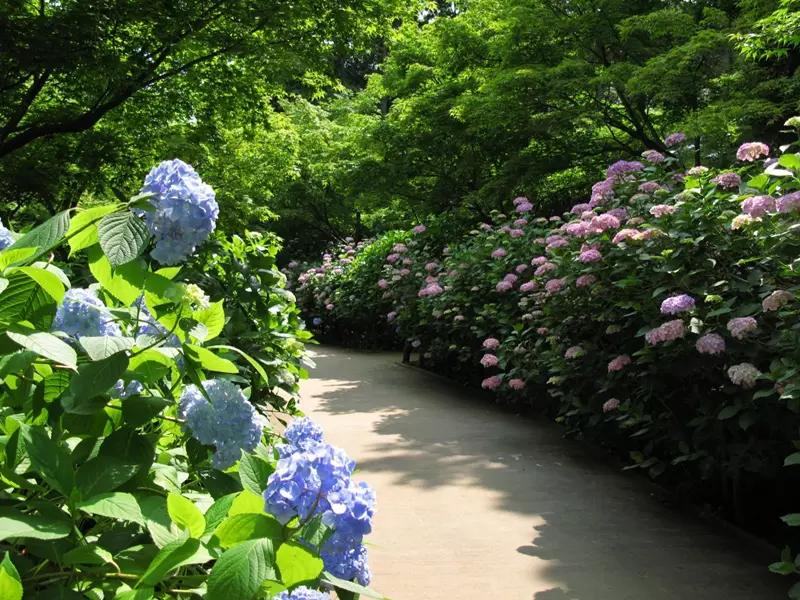
 Vibrant pink and purple hydrangeas flourishing in a well-maintained garden. Learn how to achieve stunning hydrangea blooms by adjusting soil pH, using the right fertilisers, and mastering essential watering and pruning techniques. - Source: pxhere.com; Author: Nguyen Cong Bao Anh; License: CC0 1.0
1. Adjust Soil pH to Control Flower Colour
One of the most fascinating aspects of hydrangeas is their ability to change flower colour based on soil pH. This colour transformation is primarily seen in Hydrangea macrophylla (Bigleaf Hydrangea) and Hydrangea serrata (Mountain Hydrangea). The colour variation occurs because soil pH affects the availability of aluminium, which plays a key role in the formation of plant pigments.
How Soil pH Affects Hydrangea Colour
Hydrangeas do not change colour overnight, but their blooms will shift gradually based on the pH level of the soil. Here’s how different pH levels influence flower colour:
- Acidic soil (pH below 6.0): Produces blue flowers due to increased aluminium availability.
- Neutral to alkaline soil (pH above 7.0): Produces pink or red flowers as aluminium becomes less accessible.
- Moderately acidic to neutral soil (pH 6.0–7.0): Often results in purple, lavender, or mixed pink and blue flowers.
White hydrangeas, such as Hydrangea paniculata and Hydrangea arborescens, are not affected by soil pH and will remain white throughout their blooming cycle.
How to Adjust Soil pH
Adjusting soil pH takes time, and the best results come from gradual changes. It is crucial to test your soil before applying any amendments to ensure the correct approach. Use a soil pH test kit or send a sample to a local agricultural extension service for accurate readings.
To Make Hydrangeas Blue (Lowering Soil pH)
If your hydrangeas are blooming pink and you want them to turn blue, you need to increase soil acidity. The following methods can help achieve this:
- Apply Aluminium Sulphate: Aluminium is essential for blue pigmentation. Dissolve 15g (1 tablespoon) of aluminium sulphate per gallon of water and apply it around the plant once every 4–6 weeks in spring and summer. Water thoroughly after application.
- Incorporate Organic Acidifiers: Adding pine needles, peat moss, coffee grounds, or composted oak leaves to the soil gradually lowers pH over time.
- Use Sulphur: Elemental sulphur or iron sulphate can be applied in autumn for long-term acidification. Use 20–50g per square metre depending on the current pH level.
- Water with Acidic Solutions: Mixing 1 tablespoon of white vinegar per gallon of water can help maintain acidity, but this should be used sparingly.
To Make Hydrangeas Pink (Raising Soil pH)
If your hydrangeas are blue and you want them to turn pink, you need to reduce the acidity and raise soil pH. Here are the best methods:
- Apply Garden Lime: Lime helps neutralise acidic soil. Apply 100g per square metre of dolomitic lime and water it in well. Lime is slow-acting, so results may take several months.
- Use Wood Ash: Sprinkling a thin layer of wood ash around the base of the plant will increase alkalinity and raise pH.
- Compost with Alkaline Material: Adding crushed eggshells or finely ground limestone helps stabilise pH at a higher level.
- Reduce Aluminium Absorption: High-phosphorus fertilisers (such as 10-30-10) can help block aluminium uptake, supporting pink flower production.
When to Adjust Soil pH
Soil pH should be adjusted gradually, as sudden changes can stress the plant. The best time for making amendments depends on the method used:
- Autumn: Apply lime or sulphur in autumn to allow time for it to integrate into the soil before the growing season.
- Early Spring: Use aluminium sulphate at the start of the growing season to encourage blue flowers.
- Regular Monitoring: Test soil every 4–6 weeks and make small adjustments rather than drastic changes.
How Long Does It Take for Hydrangea Colour to Change?
Soil amendments do not produce immediate changes. The process of altering hydrangea colour can take several months or even a full growing season. Factors influencing the speed of change include:
- Soil type: Clay soils take longer to adjust than sandy or loamy soils.
- Amount of amendment used: Frequent but moderate applications yield better results than a single large treatment.
- Watering consistency: Maintaining soil moisture helps nutrients penetrate more effectively.
Common Mistakes When Adjusting Soil pH
Many gardeners make errors when trying to change hydrangea colour. Avoid these common mistakes:
- Changing pH Too Quickly: Rapid pH changes can shock plants and disrupt soil health.
- Overusing Aluminium Sulphate: Excess aluminium can become toxic and damage roots.
- Ignoring Soil Type: pH changes occur more slowly in heavy clay soils.
- Neglecting Regular Testing: Without monitoring, amendments may be ineffective or even harmful.
- Expecting Instant Results: Hydrangeas need time to respond to soil changes.
Maintaining Hydrangea Flower Colour
Once you have achieved your desired hydrangea colour, maintaining it requires ongoing care. Follow these tips:
- Reapply soil amendments every spring to sustain the correct pH level.
- Use pH-adjusted fertilisers suited to your colour preference.
- Monitor pH levels at least twice a year to prevent fluctuations.
- Ensure consistent watering and organic mulch to stabilise soil conditions.
By understanding how soil pH influences hydrangea colour and following the right techniques for adjustment, you can enjoy stunning pink, blue, or even purple blooms season after season.
2. Use Coffee Grounds for Stronger Growth
Many gardeners are discovering the benefits of using coffee grounds as a natural soil amendment, particularly for hydrangeas. Rich in organic matter and essential nutrients, coffee grounds help improve soil structure, moisture retention, and plant health. When used correctly, they can promote lush foliage, stronger stems, and vibrant blooms while enhancing the overall fertility of your garden.
Why Coffee Grounds Benefit Hydrangeas
Coffee grounds contain a variety of nutrients and compounds that contribute to plant health. While they are not a complete fertiliser, they offer a slow-release source of nitrogen, which is vital for strong leaf and stem growth. The key benefits of using coffee grounds for hydrangeas include:
- Improved Soil Fertility: Coffee grounds break down gradually, releasing nitrogen, potassium, phosphorus, and trace minerals into the soil.
- Enhanced Soil Structure: Organic matter from coffee grounds helps aerate compacted soil, improving root growth and water absorption.
- Better Moisture Retention: Coffee grounds hold moisture well, reducing the risk of soil drying out too quickly.
- Natural Pest Deterrent: Slugs, snails, and some insects dislike the texture and acidity of coffee grounds, helping to protect plants from damage.
- Encouraging Beneficial Microorganisms: Coffee grounds promote microbial activity in the soil, which aids in the breakdown of organic matter and improves nutrient availability.
How to Use Coffee Grounds for Hydrangeas
Coffee grounds should be used in moderation, as excessive amounts can make the soil too acidic or lead to nitrogen imbalances. Here are the best ways to incorporate them into your hydrangea care routine:
1. Apply Directly to the Soil
Sprinkling used coffee grounds around the base of your hydrangeas can provide a gentle nutrient boost. However, they should be applied sparingly to avoid compacting the soil.
How to do it:
- Use a thin layer (no more than 5 mm thick) to prevent mould and compaction.
- Lightly mix the grounds into the topsoil to improve aeration and nutrient distribution.
- Apply once every four to six weeks during the growing season (spring to early autumn).
2. Mix with Compost
Adding coffee grounds to a compost pile balances nitrogen levels and enhances microbial activity, producing rich, well-structured compost.
How to do it:
- Mix coffee grounds with carbon-rich materials such as dry leaves, straw, or shredded newspaper to maintain a balanced compost.
- Ensure that coffee grounds make up no more than 20% of the total compost volume.
- Allow the compost to break down for several months before applying it around hydrangeas.
3. Use as a Liquid Feed
A coffee ground tea can be used as a mild fertiliser for hydrangeas, offering a quick nutrient boost.
How to do it:
- Soak two cups of used coffee grounds in a bucket of water (5 litres) for 24 hours.
- Strain the liquid and use it to water hydrangeas once a month.
- Avoid overuse, as excessive nitrogen can reduce flowering.
Does Coffee Affect Hydrangea Flower Colour?
Since coffee grounds are slightly acidic, they can contribute to lowering soil pH over time, which may encourage blue hydrangea blooms. However, the effect is minimal compared to targeted pH adjustments using aluminium sulphate or sulphur.
If you want to enhance blue blooms, combine coffee grounds with acidic organic matter such as pine needles or peat moss. For pink flowers, limit coffee ground use and apply garden lime to raise soil pH.
Precautions When Using Coffee Grounds
While coffee grounds offer multiple benefits, overuse can lead to problems such as nitrogen overload, soil compaction, and fungal growth. To prevent these issues, follow these guidelines:
- Do not apply thick layers: Excess coffee grounds can form a dense layer, restricting water and air flow.
- Avoid using fresh (unbrewed) coffee grounds: These are highly acidic and can disrupt soil balance.
- Monitor soil pH: Regular soil testing ensures that acidity levels remain suitable for hydrangea health.
- Use in moderation: Apply no more than one cup per plant per month to prevent excessive nitrogen accumulation.
Incorporating coffee grounds into your hydrangea care routine can enhance plant growth, improve soil health, and even contribute to flower colour changes. When used correctly, they provide a sustainable, eco-friendly way to nourish your garden while reducing waste.
For the best results, combine coffee grounds with other organic materials, maintain balanced soil conditions, and monitor pH levels regularly. With proper application, your hydrangeas will thrive with lush foliage, strong stems, and vibrant blooms.
3. Water Deeply but Infrequently
One of the most common mistakes gardeners make when caring for hydrangeas is watering too frequently but too shallowly. While hydrangeas love moisture, improper watering can lead to weak root development, drought stress, and increased susceptibility to diseases. Instead of frequent light watering, hydrangeas thrive best with deep, infrequent watering that encourages strong root growth and overall plant resilience.
Why Deep Watering is Essential for Hydrangeas
Hydrangeas rely on a well-established root system to absorb water and nutrients effectively. Shallow watering only moistens the top layer of soil, which leads to shallow roots that dry out quickly in hot weather. Deep watering, on the other hand, allows moisture to penetrate deeply into the soil, encouraging the roots to grow downward, making the plant more drought-resistant and less dependent on frequent watering.
Additional benefits of deep watering include:
- Stronger, deeper roots: Hydrangeas with deep roots are more stable and better equipped to handle dry periods.
- Reduced risk of fungal diseases: Frequent shallow watering increases surface moisture, creating an ideal environment for fungal infections like powdery mildew and root rot.
- Better nutrient absorption: Watering deeply helps transport essential nutrients to the root zone, improving plant health.
- Less evaporation loss: Deep watering ensures that moisture reaches the roots rather than evaporating from the soil surface.
Best Watering Practices for Hydrangeas
Proper watering techniques can significantly improve hydrangea health. Follow these best practices to ensure optimal hydration:
- Water deeply once or twice a week: Hydrangeas typically need 2.5–5 cm (1–2 inches) of water per week, depending on soil type and weather conditions. If the weather is particularly hot and dry, you may need to water more frequently.
- Use a soaker hose or drip irrigation: These methods deliver water directly to the roots, minimising evaporation and preventing fungal diseases caused by excess moisture on the leaves.
- Water early in the morning: This allows time for the soil to absorb the moisture before the heat of the day causes evaporation.
- Check soil moisture before watering: Insert your finger 5 cm (2 inches) into the soil-if it feels dry, it is time to water. If it is still moist, wait another day or two.
- Avoid overhead watering: Wet leaves increase the risk of fungal diseases. Always water at the base of the plant to keep the foliage dry.
How to Tell if Your Hydrangea Needs Water
Hydrangeas are excellent at signalling when they need water. Look for these signs:
- Wilting leaves: If leaves droop in the morning, your hydrangea is thirsty. If they wilt during the heat of the day but recover in the evening, they may not need additional watering.
- Browning or crispy leaf edges: This may indicate prolonged drought stress.
- Slow growth or small flowers: Lack of water can stunt growth and reduce flower size.
Factors That Affect Hydrangea Watering Needs
Several factors influence how often hydrangeas need to be watered, including:
- Soil Type: Sandy soils drain quickly and may require more frequent watering, while clay soils retain moisture longer.
- Climate: In hot, dry regions, hydrangeas need more water, whereas in cooler, humid climates, less frequent watering is required.
- Mulch: A 5–10 cm (2–4 inch) layer of organic mulch (such as bark, straw, or compost) helps retain soil moisture and reduces evaporation.
- Plant Maturity: Young hydrangeas require more frequent watering until their root system becomes well established.
How to Rescue an Overwatered or Underwatered Hydrangea
If your hydrangea has received too much or too little water, here is how to fix the problem:
If Overwatered:
- Stop watering until the soil dries out slightly.
- Improve drainage by adding organic matter or planting in raised beds.
- Remove yellowing or rotting leaves to prevent disease spread.
If Underwatered:
- Give a deep, thorough watering, allowing the water to soak at least 15 cm (6 inches) into the soil.
- Apply mulch around the base to conserve moisture.
- Monitor soil moisture regularly and adjust watering as needed.
Mastering the right watering technique is essential for healthy, thriving hydrangeas. By following deep, infrequent watering practices, you can encourage strong root development, reduce disease risk, and ensure lush foliage and vibrant blooms. Remember to adapt your watering schedule based on soil type, climate, and plant needs to keep your hydrangeas flourishing.
4. Prune Based on Bloom Type
Pruning is essential for maintaining healthy, vigorous hydrangeas, but incorrect pruning can lead to weaker plants, fewer flowers, and stunted growth. The key to successful pruning lies in understanding whether your hydrangea blooms on old wood or new wood. Cutting at the wrong time can result in the loss of next season’s blooms, so timing and technique are crucial.
Understanding Bloom Types: Old Wood vs. New Wood
Different hydrangea species set their flower buds at different times. Knowing your hydrangea’s bloom type helps determine when and how to prune.
- Old wood bloomers: These hydrangeas develop their flower buds on the previous year’s stems. Cutting them too late can remove the buds, resulting in no flowers the following year.
- New wood bloomers: These hydrangeas set their buds on new growth each spring, allowing for more flexibility when pruning.
How to Identify Your Hydrangea’s Bloom Type
To avoid unnecessary pruning mistakes, identify your hydrangea variety and its bloom habit:
When and How to Prune Old Wood Bloomers
Hydrangeas that bloom on old wood should be pruned immediately after flowering, typically in late summer or early autumn. These plants begin setting their buds for the following season shortly after their current blooms fade.
Pruning steps:
- Remove dead or weak stems: Cut back any damaged, diseased, or non-flowering stems to improve air circulation.
- Shape lightly: Trim only the tips if necessary to maintain the desired shape, but avoid heavy pruning.
- Leave the healthy buds: Do not cut into stems that have visible buds, as these will develop into next season’s flowers.
Common mistakes to avoid:
- Do not prune in late autumn or early spring, as this removes next year’s flower buds.
- Avoid cutting back all stems, as this can lead to a flowerless season.
- Do not remove green, healthy stems unless absolutely necessary.
When and How to Prune New Wood Bloomers
Hydrangeas that bloom on new wood are best pruned in late winter or early spring, before new growth starts. Since they set buds on the current season’s growth, they can be pruned more aggressively without affecting flower production.
Pruning steps:
- Cut back to 30–60 cm (12–24 inches): Reduce the plant’s height by pruning stems back to a strong set of buds.
- Remove old, weak stems: Cut out any dead, thin, or crossing branches to encourage new, healthy growth.
- Encourage bushier growth: Cutting lower on the stem promotes fuller, more compact plants.
Common mistakes to avoid:
- Do not prune in late summer or autumn, as this can lead to excessive soft growth before winter.
- Avoid leaving weak, thin stems, as they may not support heavy blooms.
- Do not over-prune young plants; allow them to establish before heavy trimming.
Pruning Hydrangeas for Maximum Blooms
Pruning is not just about maintaining plant size-it also impacts flowering. To maximise blooms, follow these additional pruning tips:
- Use sharp, clean secateurs: Blunt or dirty tools can cause jagged cuts and increase the risk of infection.
- Prune for airflow: Removing some inner branches allows better light penetration and air circulation, reducing disease risk.
- Cut at a 45-degree angle: This helps water run off the cut, preventing rot.
- Fertilise after pruning: Applying a balanced fertiliser supports regrowth and enhances flowering.
What to Do If You Pruned at the Wrong Time
If you have accidentally pruned your hydrangea incorrectly, do not panic. Here is what to do:
If You Cut an Old Wood Bloomer Too Late:
- Do not prune further-allow the plant to recover naturally.
- Provide extra care with consistent watering and feeding to support regrowth.
- Accept that you may not get blooms this season, but the plant will recover for the next year.
If You Over-Pruned a New Wood Bloomer:
- Monitor growth carefully - new shoots should appear within a few weeks.
- Fertilise lightly to encourage new stem development.
- Avoid additional pruning for the rest of the season.
Proper pruning is essential for healthy, flourishing hydrangeas. By understanding whether your hydrangea blooms on old or new wood, you can prune at the right time, encourage strong growth, and ensure abundant flowering. Always use the correct tools, prune with care, and adjust your technique based on your plant’s specific needs.
5. Apply Mulch for Healthier Plants
Mulching is one of the simplest yet most effective ways to improve the health of hydrangeas. It plays a vital role in moisture retention, temperature regulation, soil enrichment, and weed suppression. A properly applied mulch layer not only keeps the roots protected but also enhances soil quality over time, leading to stronger growth and more abundant blooms.
Why Mulching is Essential for Hydrangeas
Hydrangeas thrive in moist, well-draining soil with a steady supply of nutrients. Mulching provides several benefits that directly contribute to their overall health:
- Retains Moisture: Mulch reduces water evaporation, keeping the soil consistently moist, which is crucial for hydrangeas during dry periods.
- Regulates Soil Temperature: A mulch layer acts as insulation, keeping roots cooler in summer and preventing frost damage in winter.
- Suppresses Weeds: A thick mulch layer blocks sunlight, reducing weed growth and competition for nutrients.
- Improves Soil Structure: Organic mulches decompose over time, adding valuable nutrients and improving soil aeration.
- Prevents Soil Erosion: Mulch stabilises the soil, preventing heavy rain from washing away essential nutrients.
- Encourages Beneficial Microorganisms: Decomposing organic mulch enhances microbial activity, which helps break down nutrients for plant absorption.
Best Types of Mulch for Hydrangeas
Not all mulches are equally beneficial. Choosing the right type can make a significant difference in soil quality and plant health. Here are the best mulch options for hydrangeas:
1. Bark Chips
Best for: Long-term moisture retention and improving soil structure.
Bark mulch is one of the most durable options, lasting several seasons before needing replenishment. It helps regulate moisture levels and reduces temperature fluctuations.
2. Compost
Best for: Providing nutrients and improving soil fertility.
Compost is a nutrient-rich organic mulch that gradually breaks down, enriching the soil with essential minerals. It also encourages beneficial microbes that enhance root health.
3. Leaf Mould
Best for: Retaining moisture and fostering beneficial microbial activity.
Leaf mould is created by decomposed leaves and is an excellent mulch for hydrangeas. It holds water efficiently and enhances soil structure, making it ideal for dry conditions.
4. Pine Needles
Best for: Lowering soil pH for blue hydrangeas.
Pine needles slowly acidify the soil as they decompose, making them a great choice for gardeners aiming to maintain blue flower colour.
5. Straw or Hay
Best for: Winter protection and preventing soil erosion.
Straw mulch is particularly useful in colder months, as it insulates roots against frost. It also prevents rain from compacting the soil.
How to Apply Mulch Correctly
Applying mulch properly ensures that hydrangeas receive the full benefits without risk of disease or over-compaction. Follow these steps for the best results:
- Choose the Right Time: The best time to apply mulch is in early spring to conserve moisture and in late autumn to protect against winter cold.
- Prepare the Soil: Before adding mulch, clear away weeds and debris to prevent pests and diseases.
- Apply an Even Layer: Spread a 5–10 cm (2–4 inch) layer around the base of the plant. Avoid piling mulch directly against the stems, as this can cause rot.
- Maintain a Gap: Keep a 5 cm (2-inch) space between the mulch and the hydrangea stems to prevent excess moisture buildup.
- Replenish as Needed: Organic mulches decompose over time, so top up the layer once or twice a year to maintain effectiveness.
Common Mulching Mistakes to Avoid
Although mulching is simple, some common mistakes can reduce its effectiveness or even harm your plants:
- Piling Mulch Too High: A thick mulch layer (over 10 cm) can suffocate roots and prevent water from penetrating the soil.
- Placing Mulch Against Stems: Direct contact with plant stems increases the risk of rot and fungal diseases.
- Using Fresh Wood Chips or Sawdust: These can deplete nitrogen levels in the soil, leading to weaker growth.
- Applying Non-Organic Mulches: Plastic or rubber mulches do not break down and fail to improve soil structure.
How Often Should You Mulch Hydrangeas?
The frequency of mulching depends on the type of material used:
- Compost or leaf mould: Replenish every 3–6 months as they decompose quickly.
- Bark chips or wood mulch: Refresh every 1–2 years as they break down more slowly.
- Pine needles: Add a fresh layer annually to maintain acidity and moisture retention.
Mulching is an essential step in maintaining healthy, thriving hydrangeas. By choosing the right mulch type and applying it correctly, you can enhance soil moisture, regulate temperature, suppress weeds, and improve overall plant health. With proper mulching techniques, your hydrangeas will reward you with lush foliage and vibrant blooms season after season.
By following these five hydrangea care hacks, you will give your plants the best possible conditions to thrive. Whether you are adjusting soil pH for perfect blooms, watering efficiently, or mulching for healthier roots, these simple tricks will help you grow stronger, more vibrant hydrangeas year after year.
About the Author

Richard Seres-Nagy is a passionate gardener with over 20 years of experience in hydrangea care. He founded Hydrangea Library to share expert advice, step-by-step guides, and practical tips for fellow gardening enthusiasts.
Read More